Introduction
After setting up the general timetable structure, the next crucial step is adding subject information. Subjects form the core of your academic curriculum and proper setup ensures an effective learning experience for students.
Before starting this step, make sure you have:
- Completed the general information setup
- Gathered a complete list of all subjects taught at your school
- Identified any subjects with special requirements (lab sessions, double periods, etc.)
- Noted subjects that have specific timing restrictions
Adding Subject Information
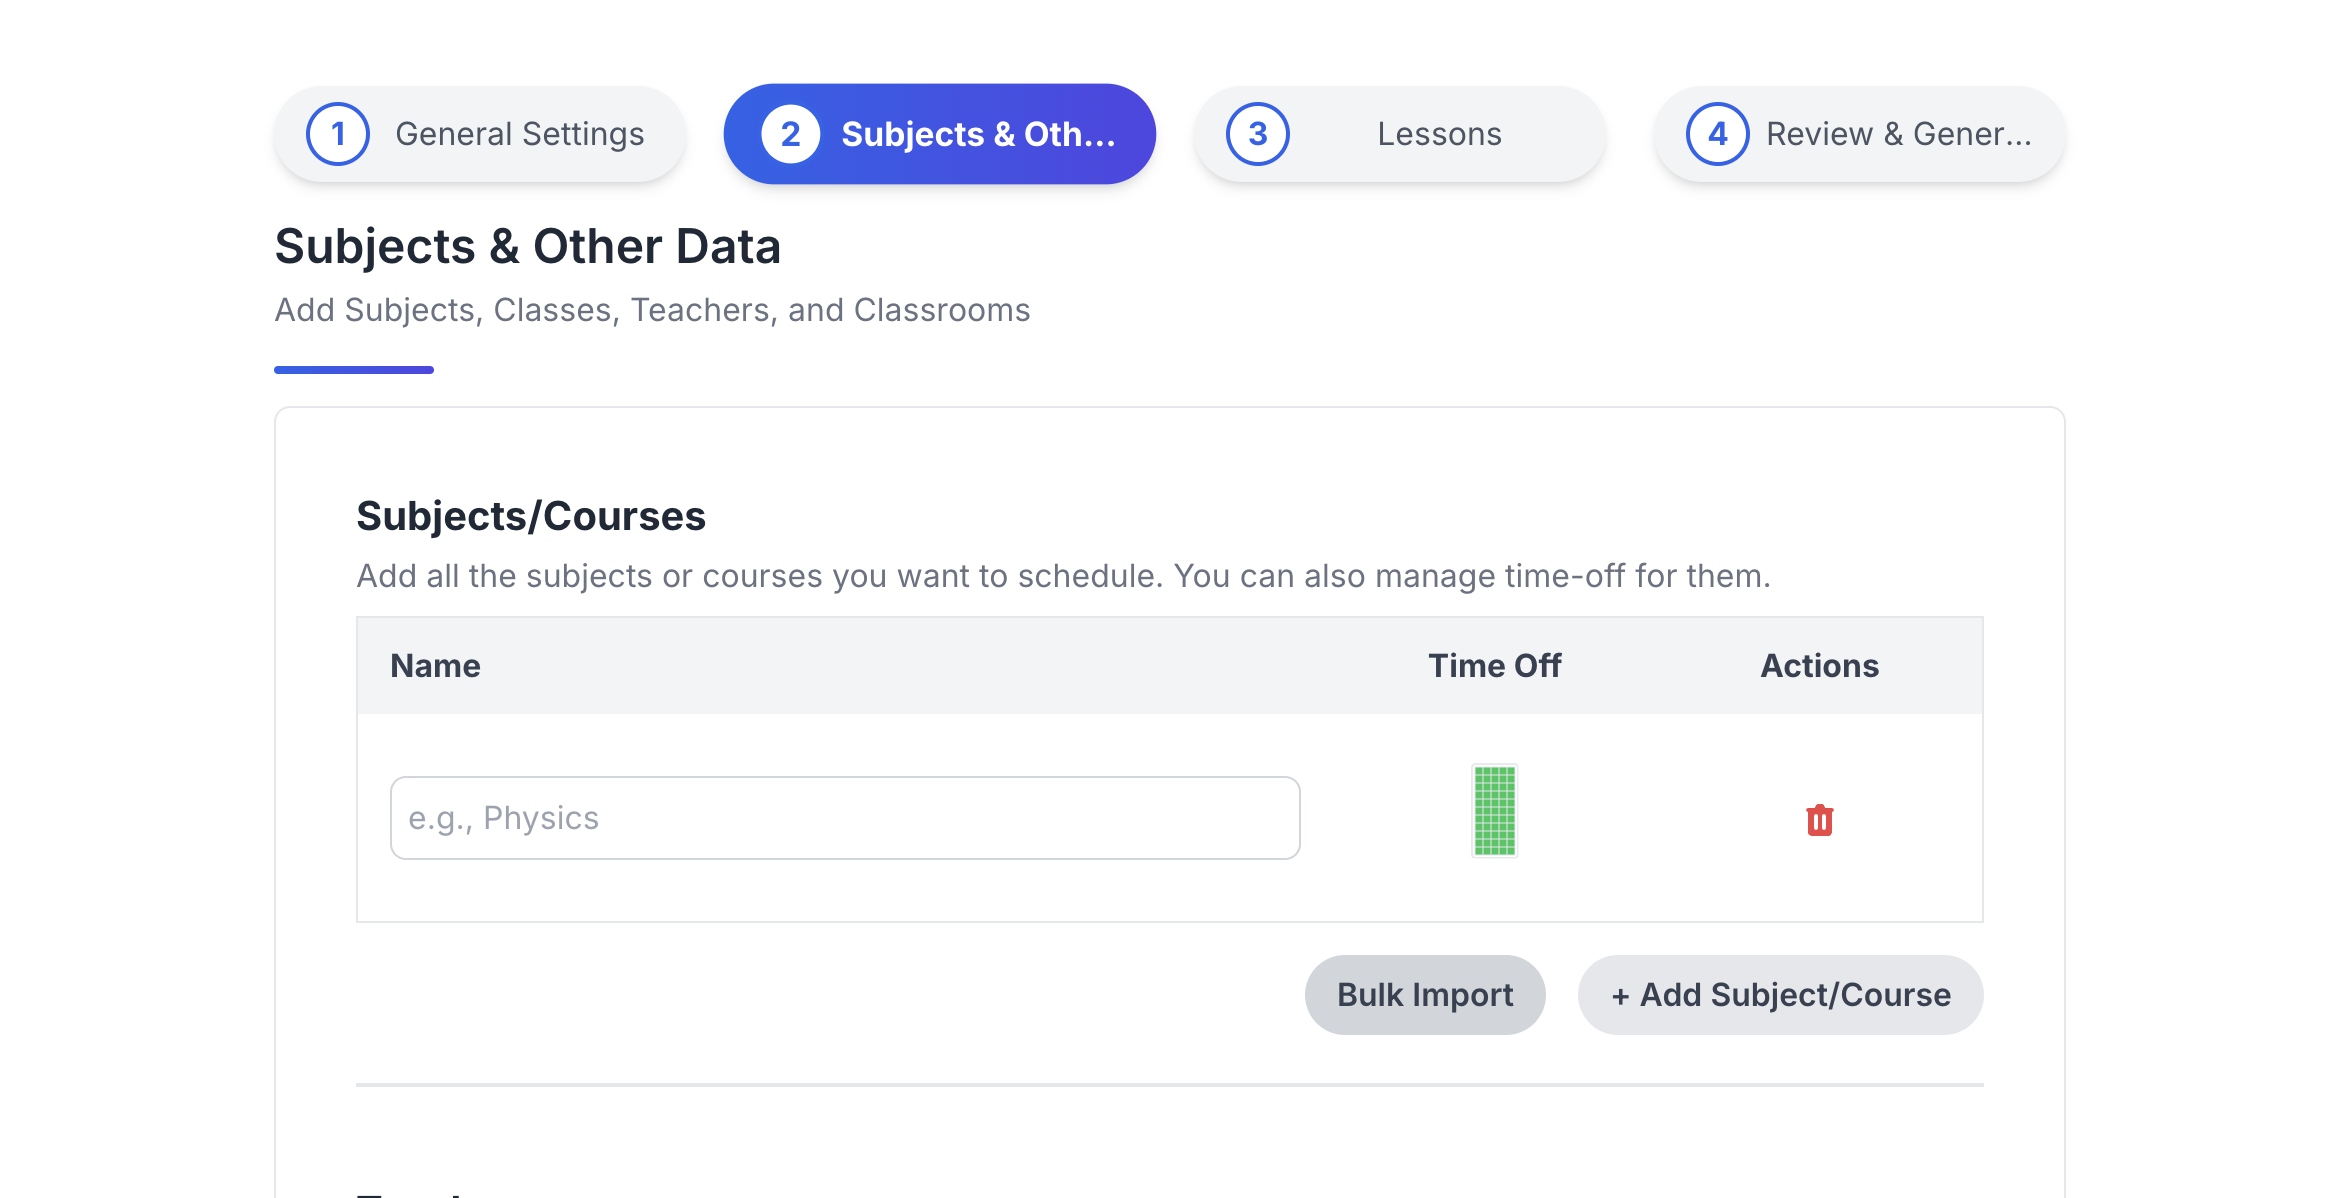
TimetableMaster provides a streamlined interface for adding all your school subjects:

Subject Entry Interface
Key Subject Parameters:
- Subject Code: Automatically Generated (A short identifier for the subject - e.g., "MATH")
- Subject Name: The full name of the subject (e.g., "Mathematics")
- Color Code: Automatically Generated (Visual identifier in the final timetable)
- Availability: Any time-off requirements
Individual vs. Bulk Addition
You can add subjects one by one or use the bulk import feature for efficiency:
Individual Addition
Enter details for each subject manually. This is ideal for schools with a small number of subjects or when making minor adjustments.
Bulk Import
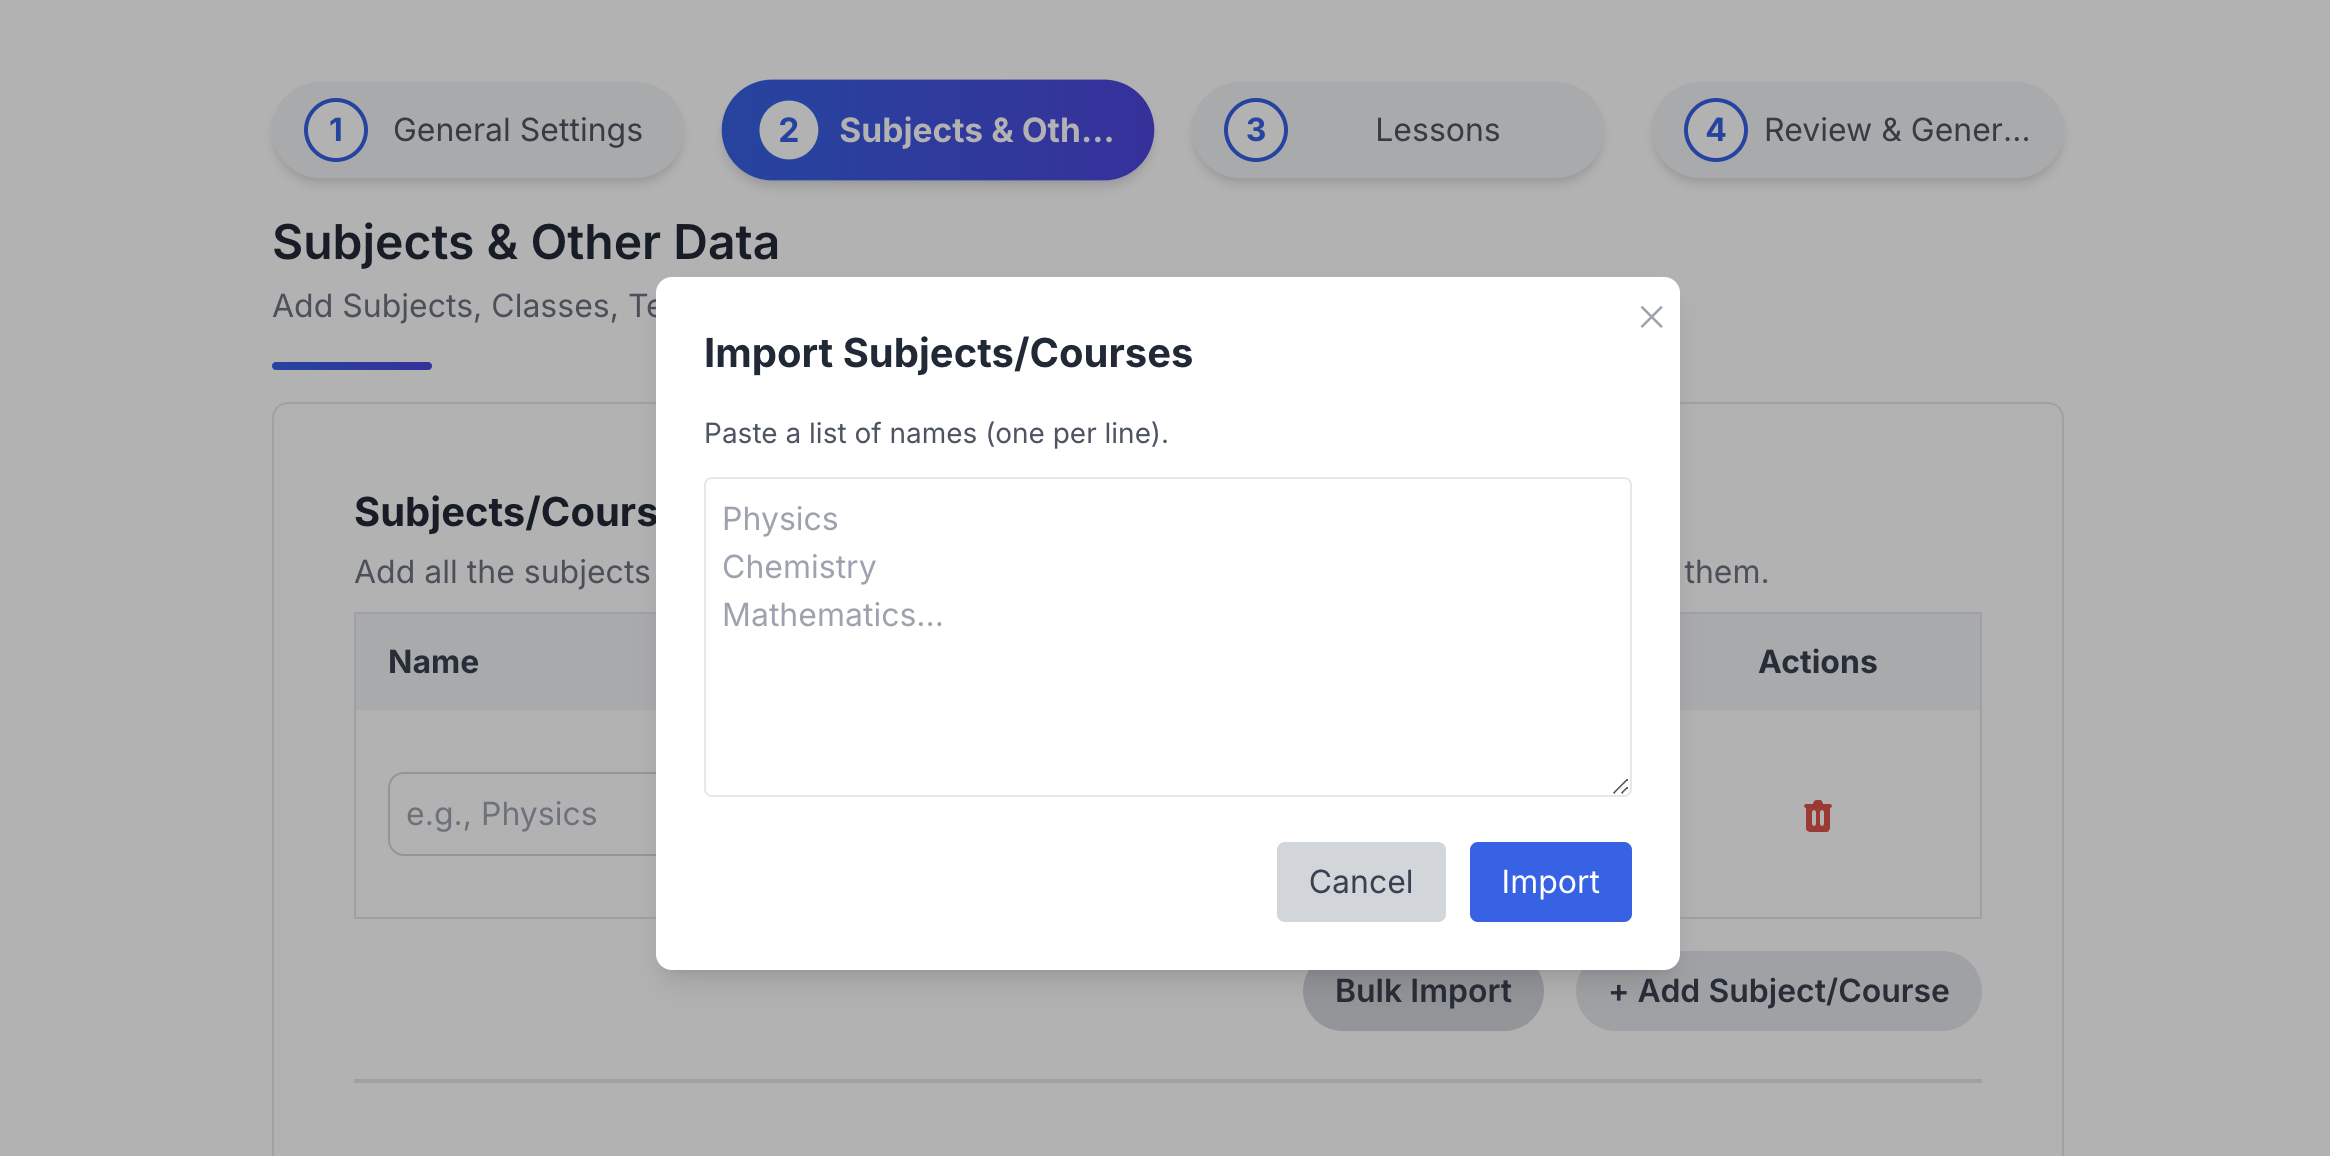
For larger schools, the bulk import feature saves time:

Bulk Import Tool
- Click the "Bulk Import" button
- Paste data from Excel or CSV file
- Review and confirm the import
Prepare your subject data in a spreadsheet before starting. This preparation will streamline the import process.
Sample CSV Format
Subject Name
Mathematics
English
Physics
Chemistry
Fine Arts
Subject-Specific Settings
Time-Off Settings
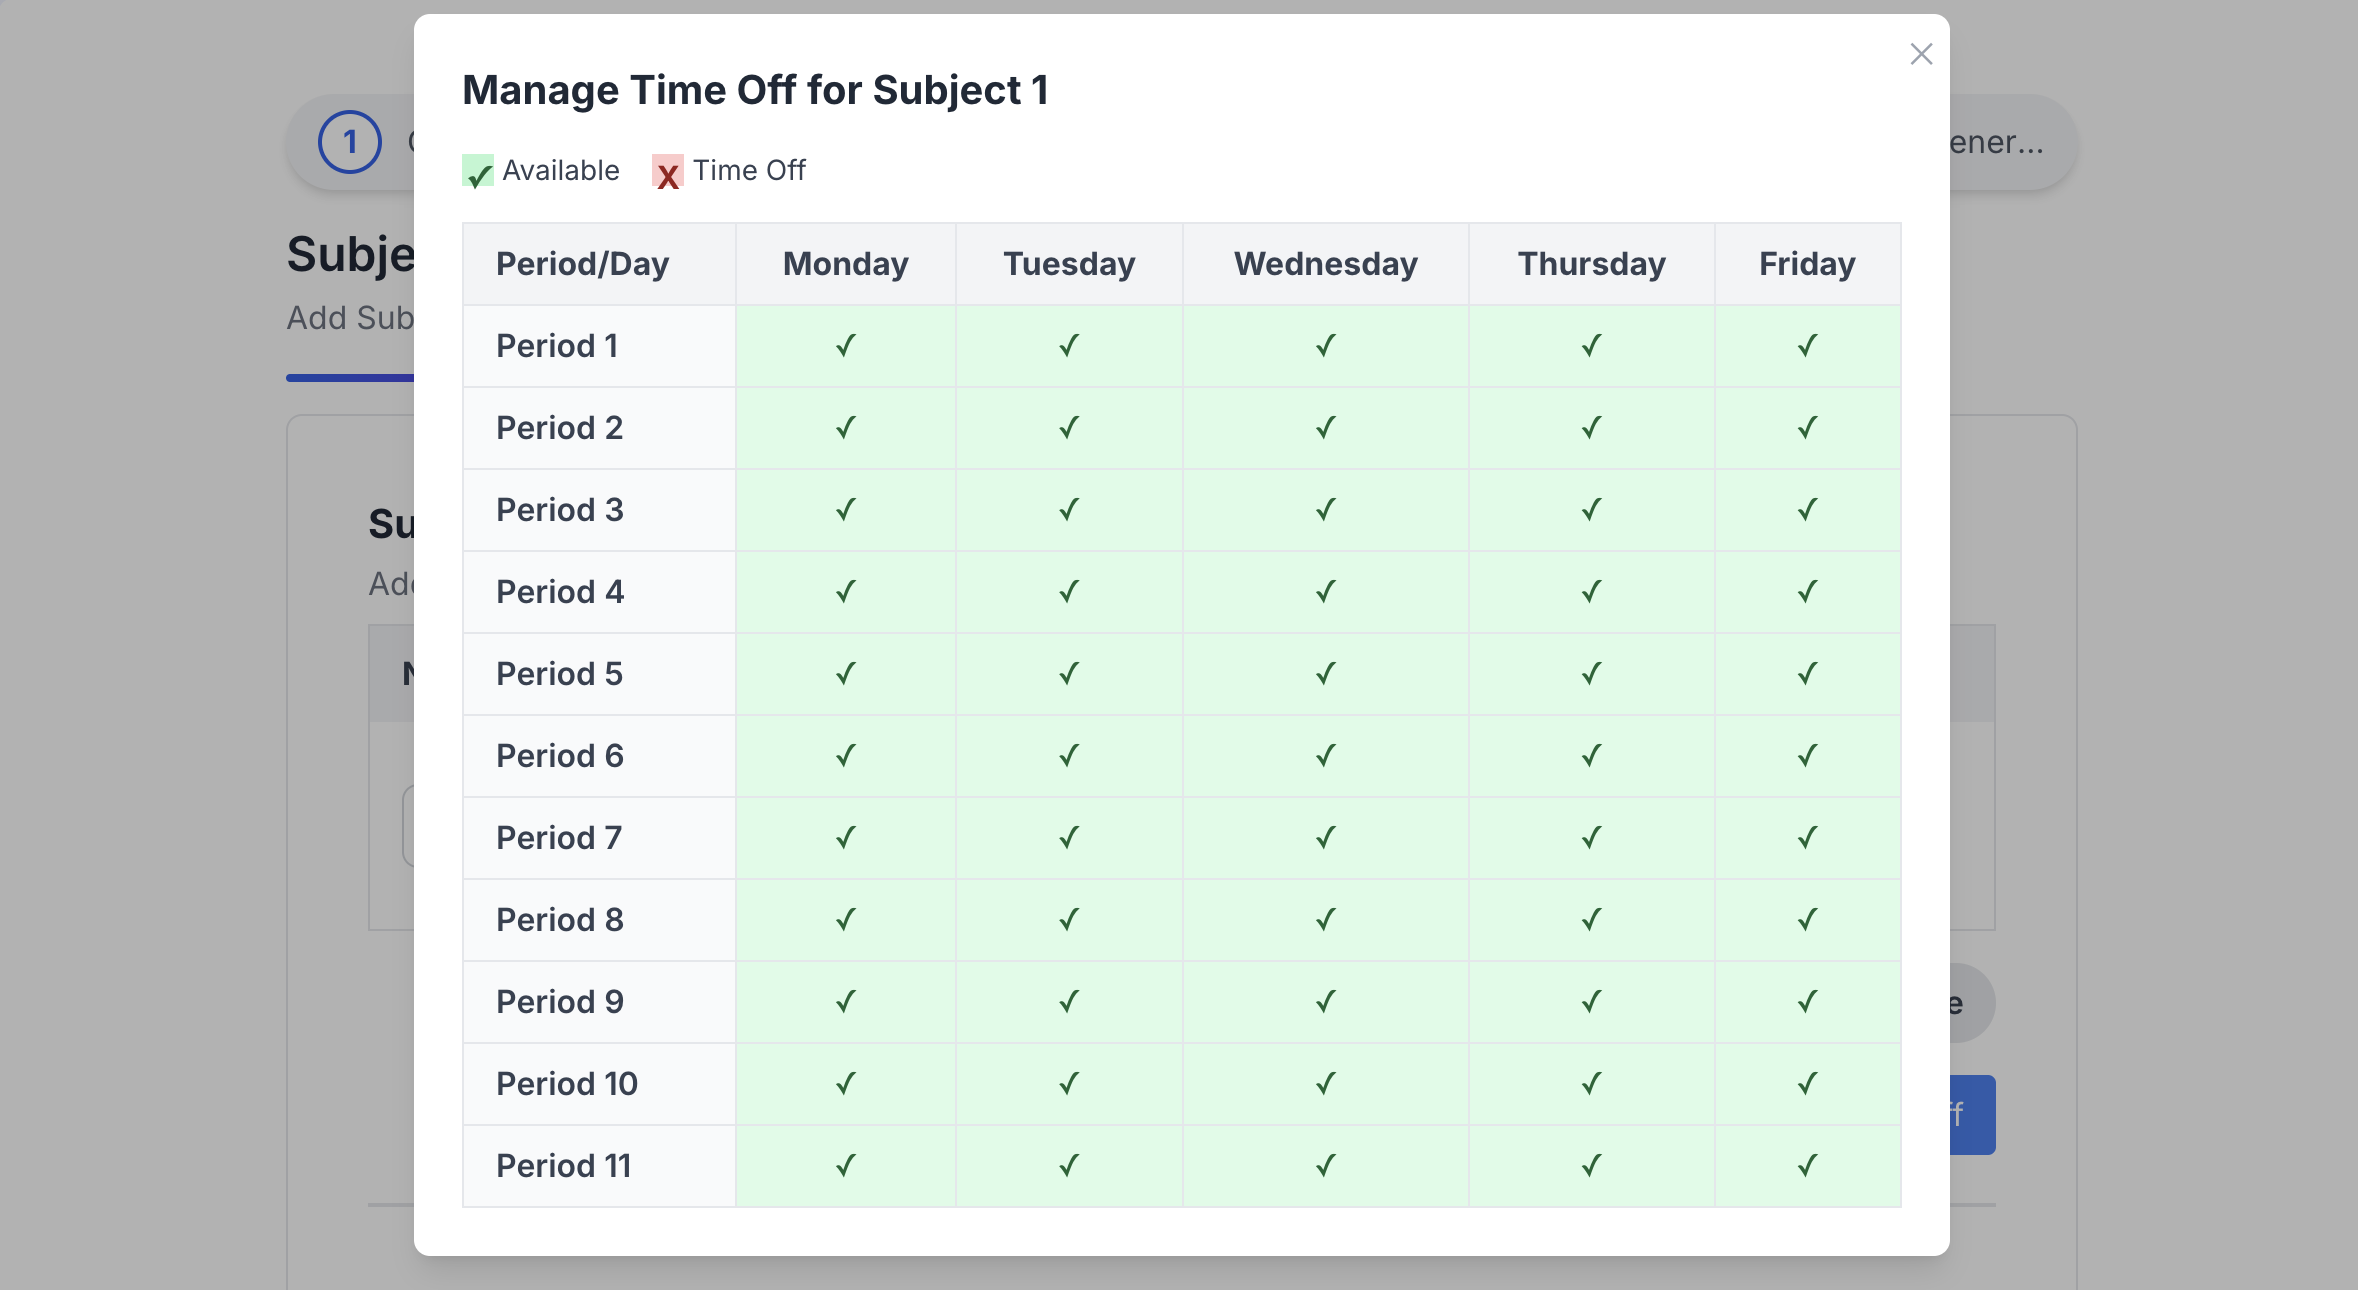
Some subjects may have specific timing restrictions:

Time-off Settings
For example, you might want to restrict:
- Physical Education classes in the afternoon on hot days
- Lab-intensive subjects to periods where lab assistants are available
- Language classes to morning periods when student concentration is higher
To set time-off for a subject:
- Click the "Availability" button for the specific subject
- Select days and periods when the subject should not be scheduled
Setting too many restrictions can make timetable generation difficult or even impossible. Add only necessary constraints and prioritize them carefully.
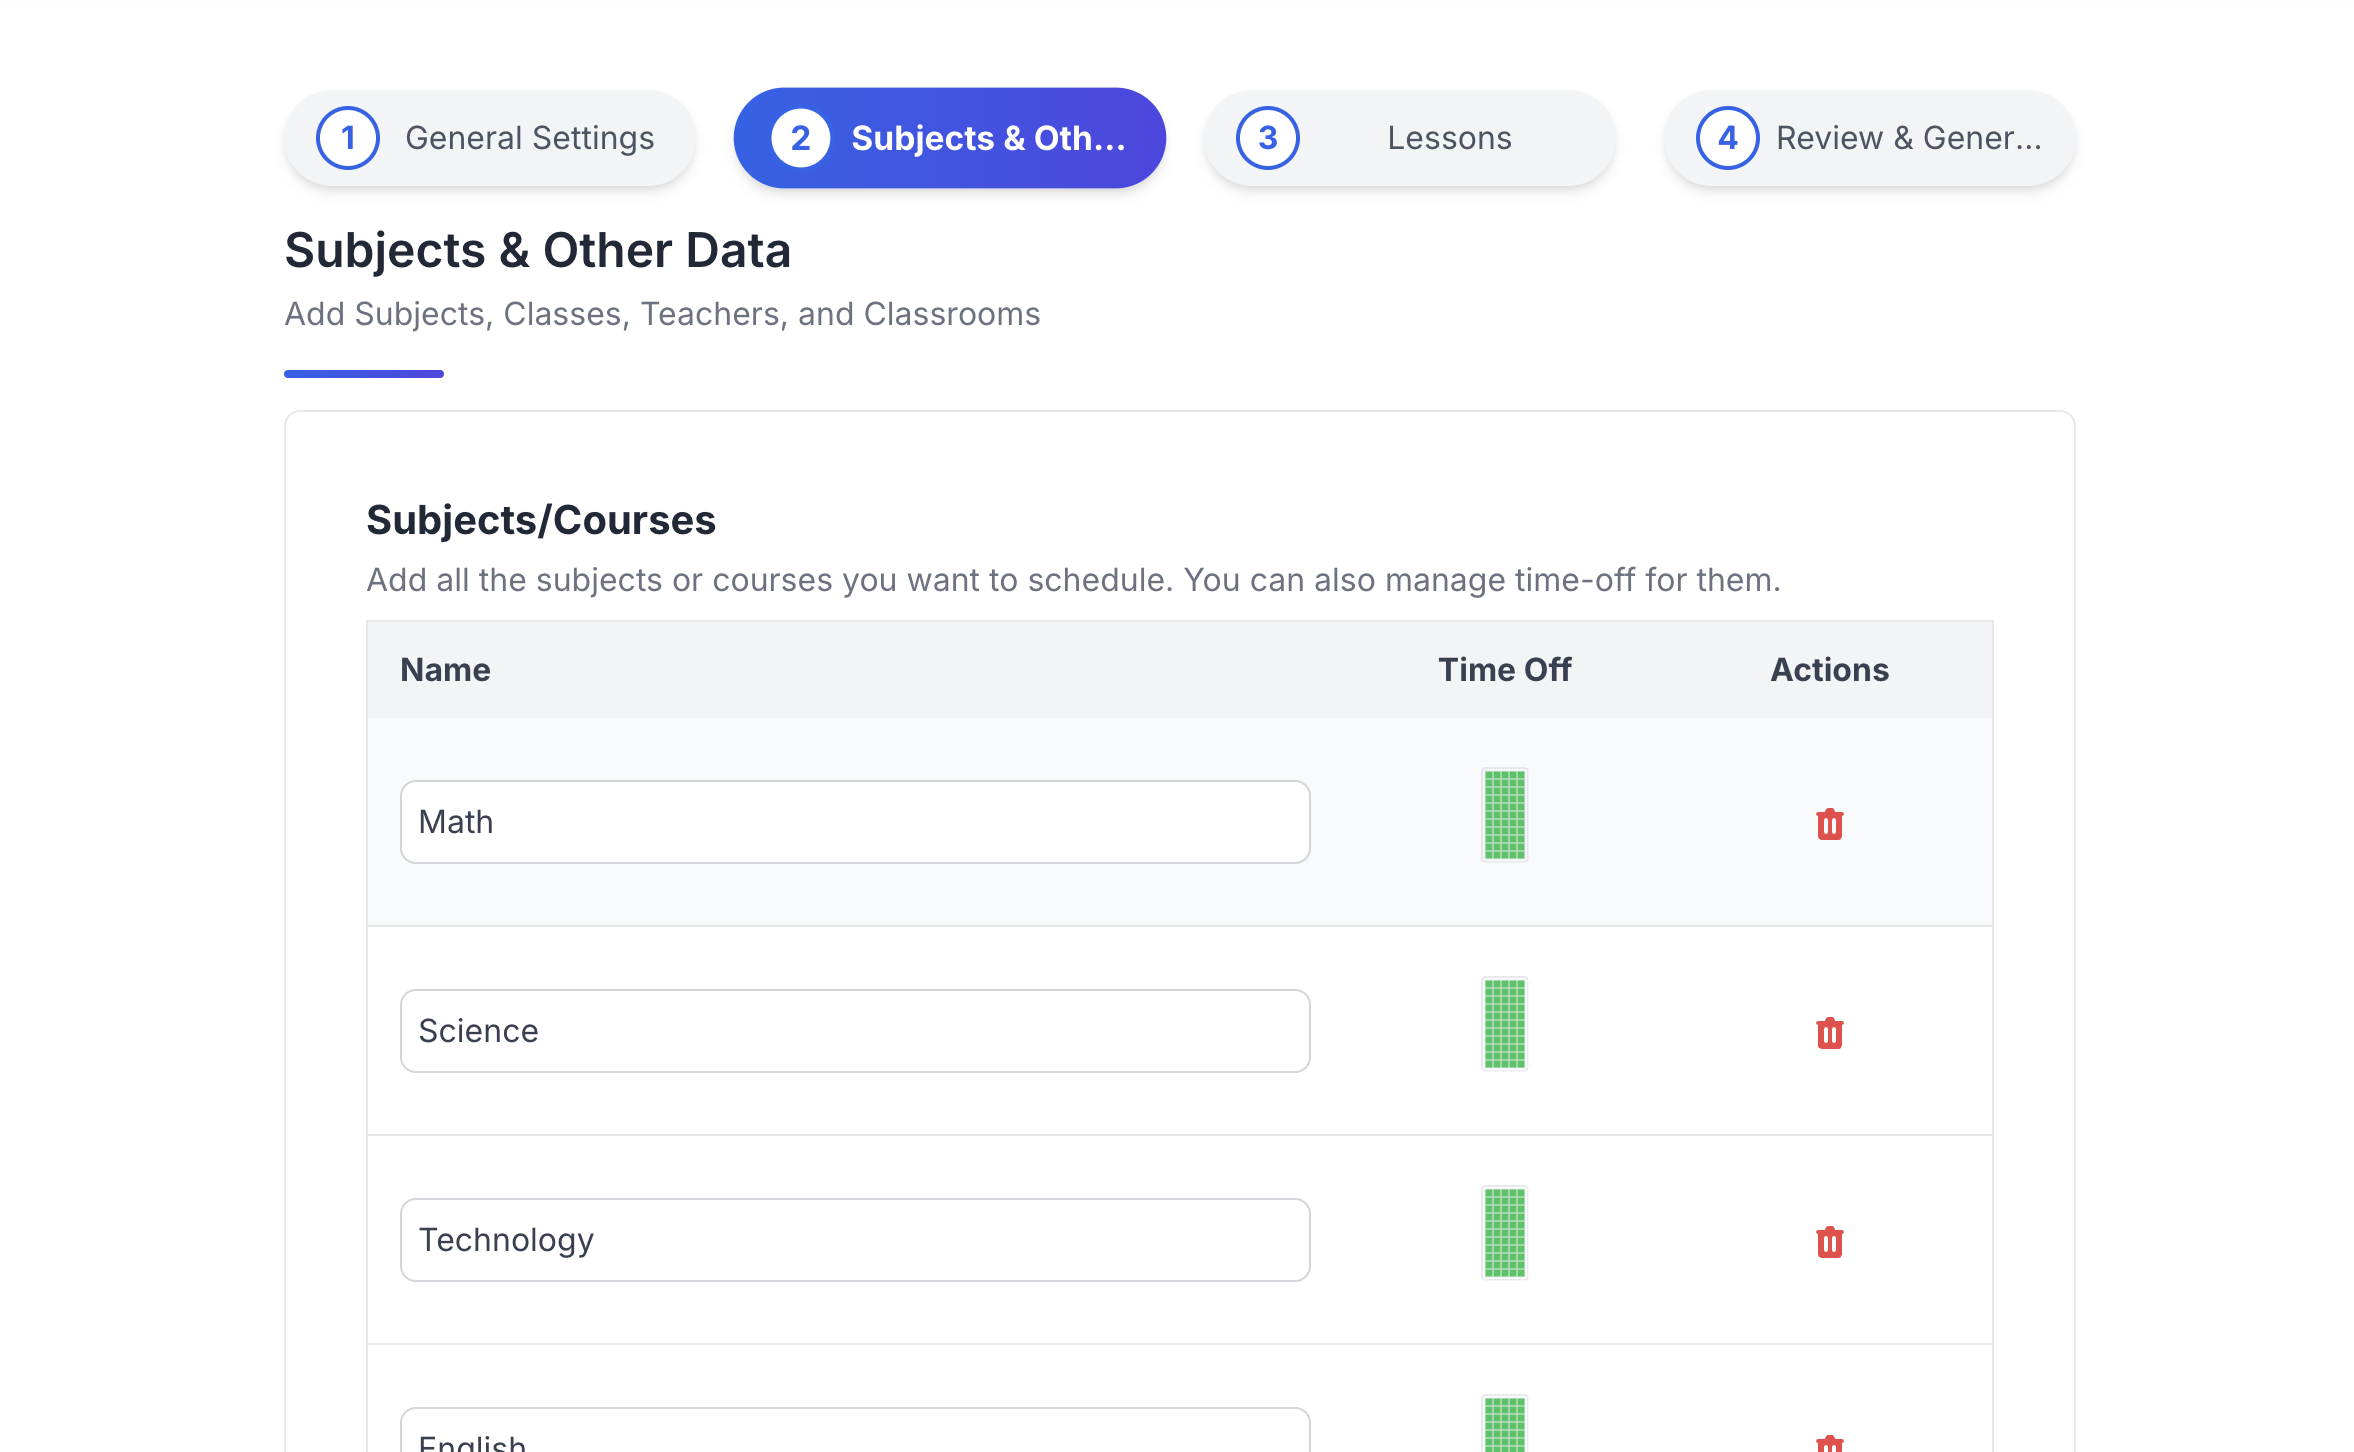
Completed Subject Setup
After adding all subjects, your subject list should look similar to this:

Completed Subjects
Review your subject list thoroughly before proceeding. Missing subjects or incorrect settings can cause issues later in the timetable generation process.
Tips & Best Practices
Use Consistent Naming Conventions
Establish a clear naming pattern for your subjects:
- Consider including grade level in the subject name if the constraints differ on grade level (e.g., "Math 9" instead of just "Math")
- Use consistent abbreviations
Review and Clean Up
Before proceeding to the next step:
- Check for duplicate subjects
- Ensure all subjects have the necessary information
- Verify special requirements are correctly assigned
Next Steps
With your subjects properly configured, you're now ready to set up the classes in your school. The class structure will determine how students are organized and how subjects are distributed among them.
Before Moving On, Ensure You Have:
- ✓ Added all subjects taught in your school
- ✓ Set any necessary time-off constraints
- ✓ Reviewed the complete subject list for accuracy
Ready to proceed? Continue to the next step to start setting up your school's teachers.