Step-by-Step School Timetable Generation using TimetableMaster
Creating a school timetable can be an overwhelming task, especially when juggling multiple classes, teachers, and subjects. This comprehensive guide will walk you through the entire process of generating an efficient school timetable using TimetableMaster, turning what used to be days of work into a matter of minutes.
Video Tutorial: See TimetableMaster in Action
Watch our comprehensive tutorial to see how easy it is to create conflict-free school timetables with TimetableMaster:
Watch Our Timetable Generation Tutorial
See how easy it is to create a conflict-free school timetable with TimetableMaster.
Understanding the Challenge
Creating a school timetable involves managing multiple moving parts:
- Multiple classes and grade levels
- Various subject requirements
- Teacher availability and preferences
- Room and resource constraints
- Break times and special periods
For example, scheduling even a mid-sized school with 11 classes, 12 subjects, and 16 teachers across 11 periods per day results in coordinating over 600 periods weekly. Without the right tools, this can become a logistical nightmare.
See how much time you could save with automated timetable generation
Recommendation
Based on your inputs, automated timetable generation could save you approximately 0 hours per schedule creation cycle. This represents a 0% increase in efficiency, allowing you to focus on other important tasks.
Step-by-Step Timetable Generation Process
Step 1: Setting Up General Details
The foundation of any good timetable starts with defining its basic structure:
- Basic Configuration:
- Timetable name (e.g., "Semester 1 2024")
- Number of periods per day
- Working days per week
- Break time slots
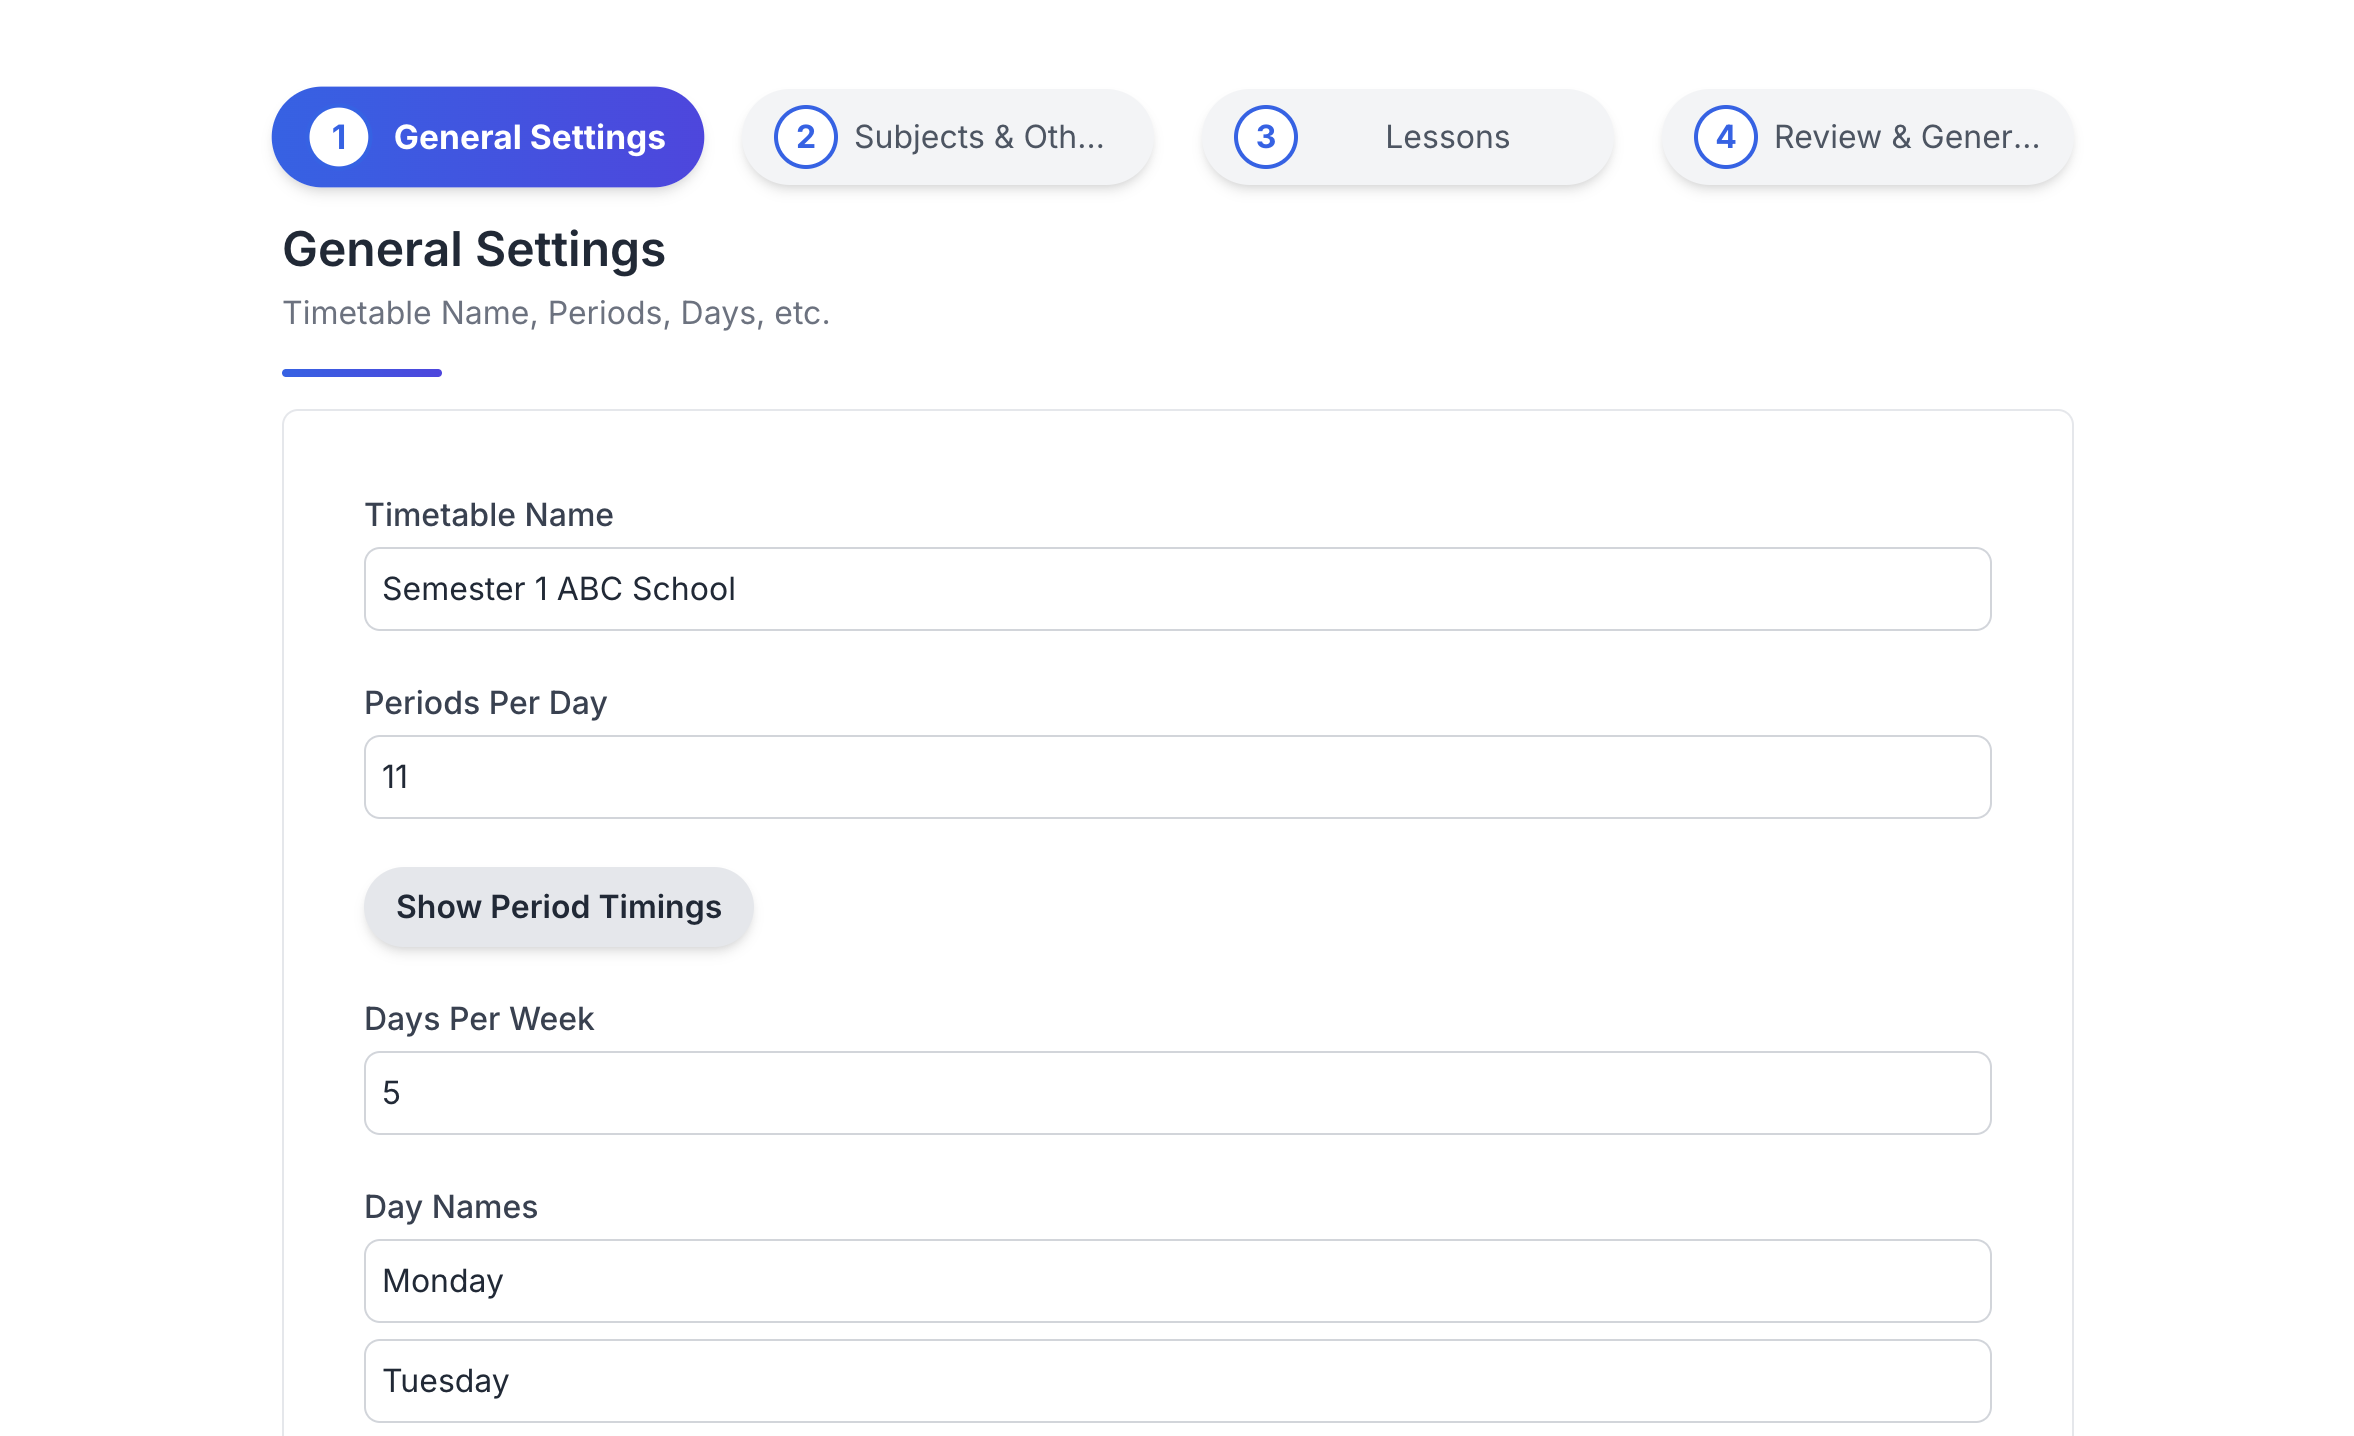
General Setup
Pro Tip: While period timings and break schedules are optional for generation, adding them improves the final timetable's readability and usability.
Optional Settings:
- Specific period timings for each day
- Break time durations
- Special period markings
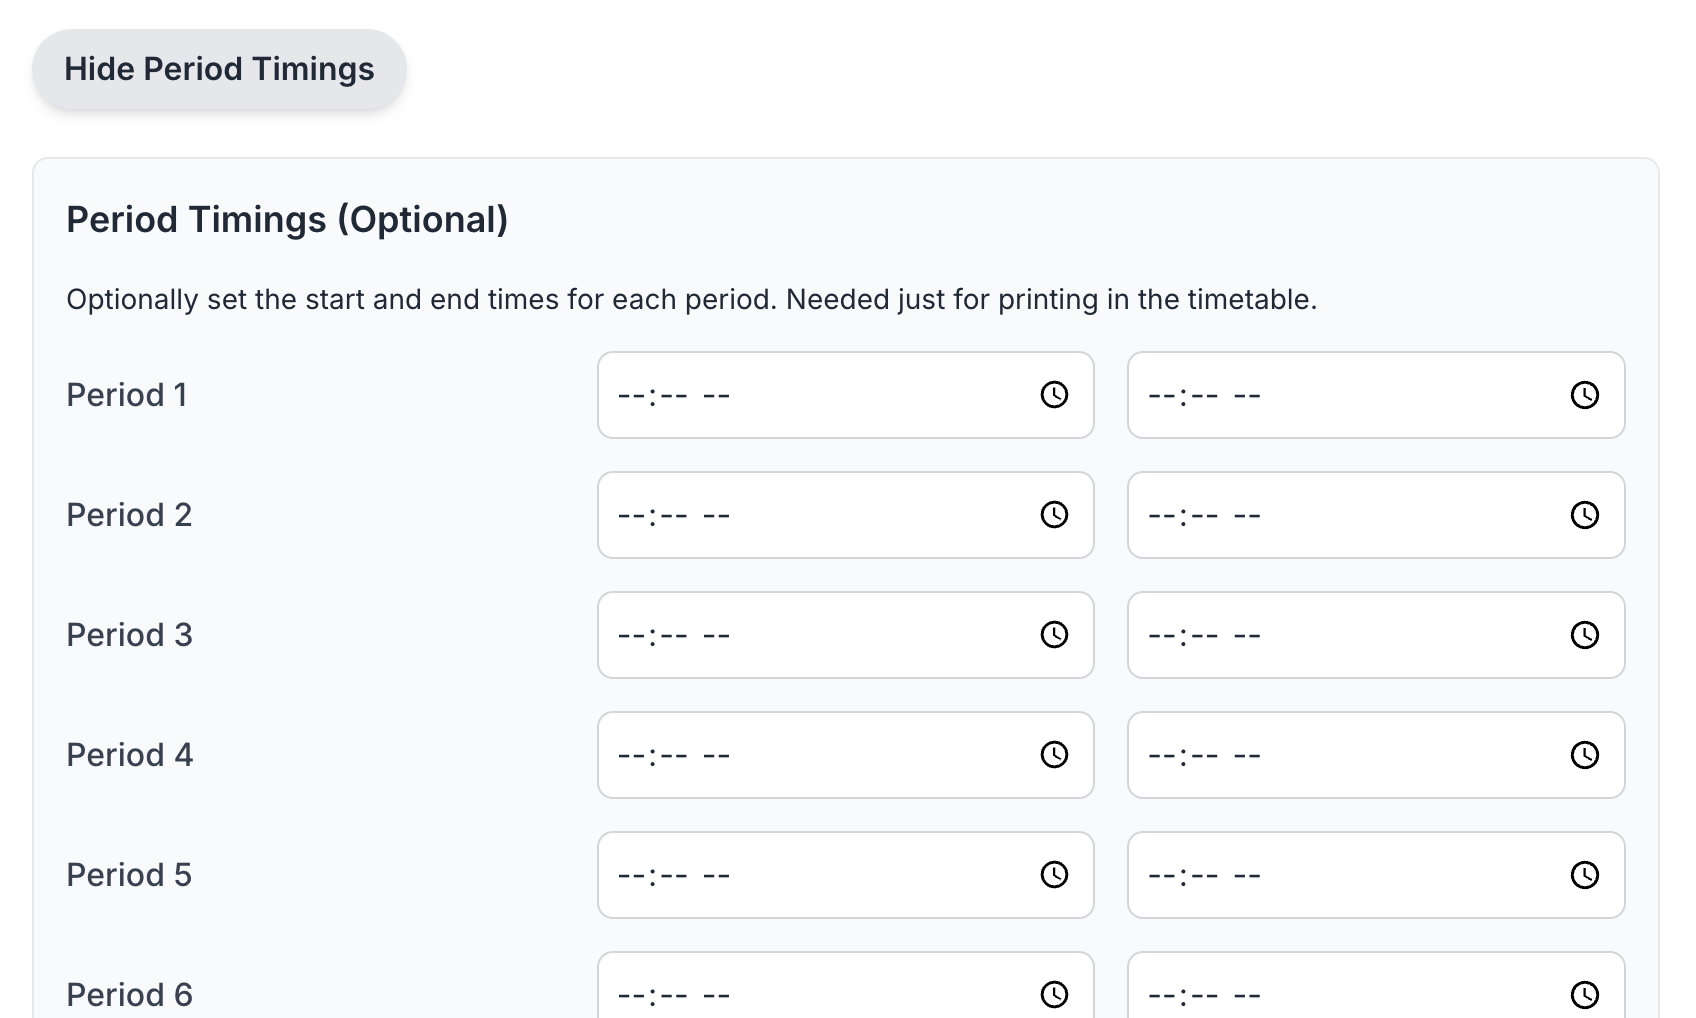
Period Configuration
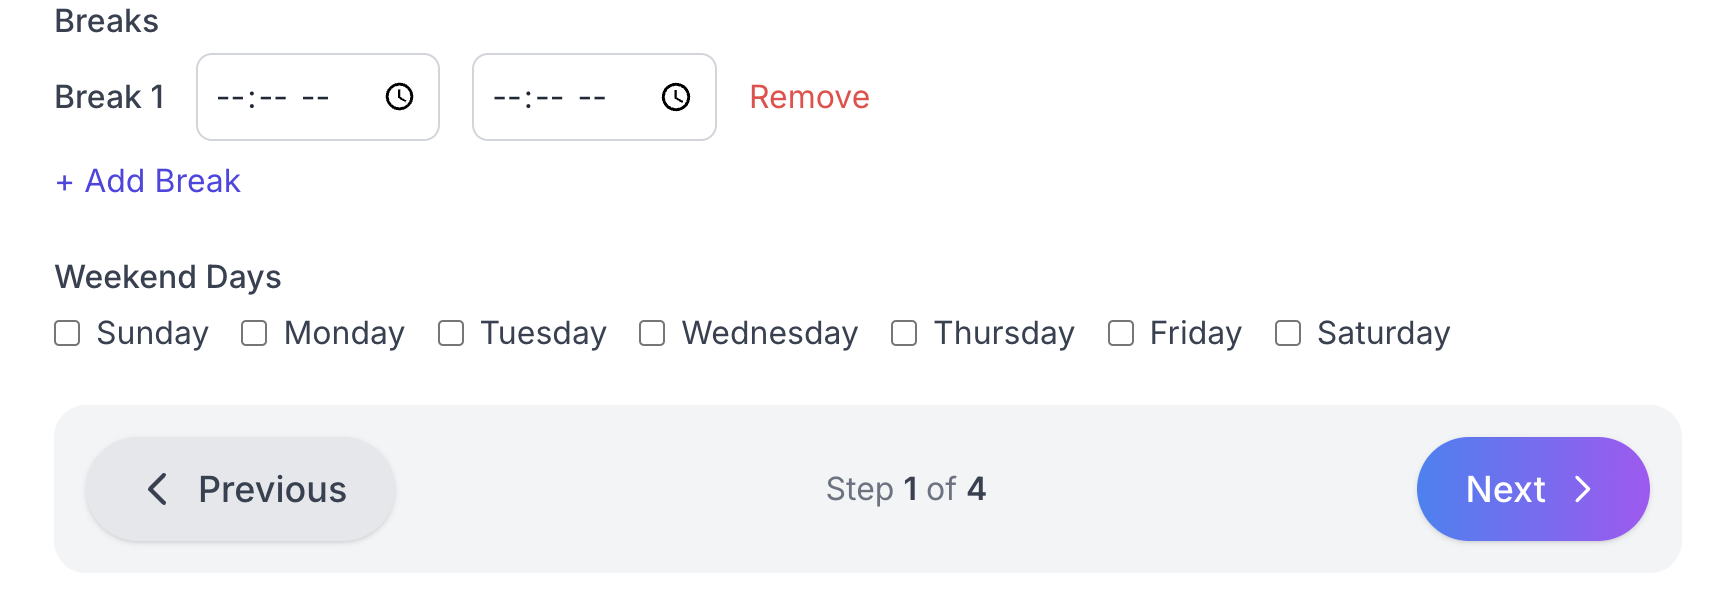
Break Time Setup
Step 2: Subject Configuration
This step involves listing all subjects taught in your school:
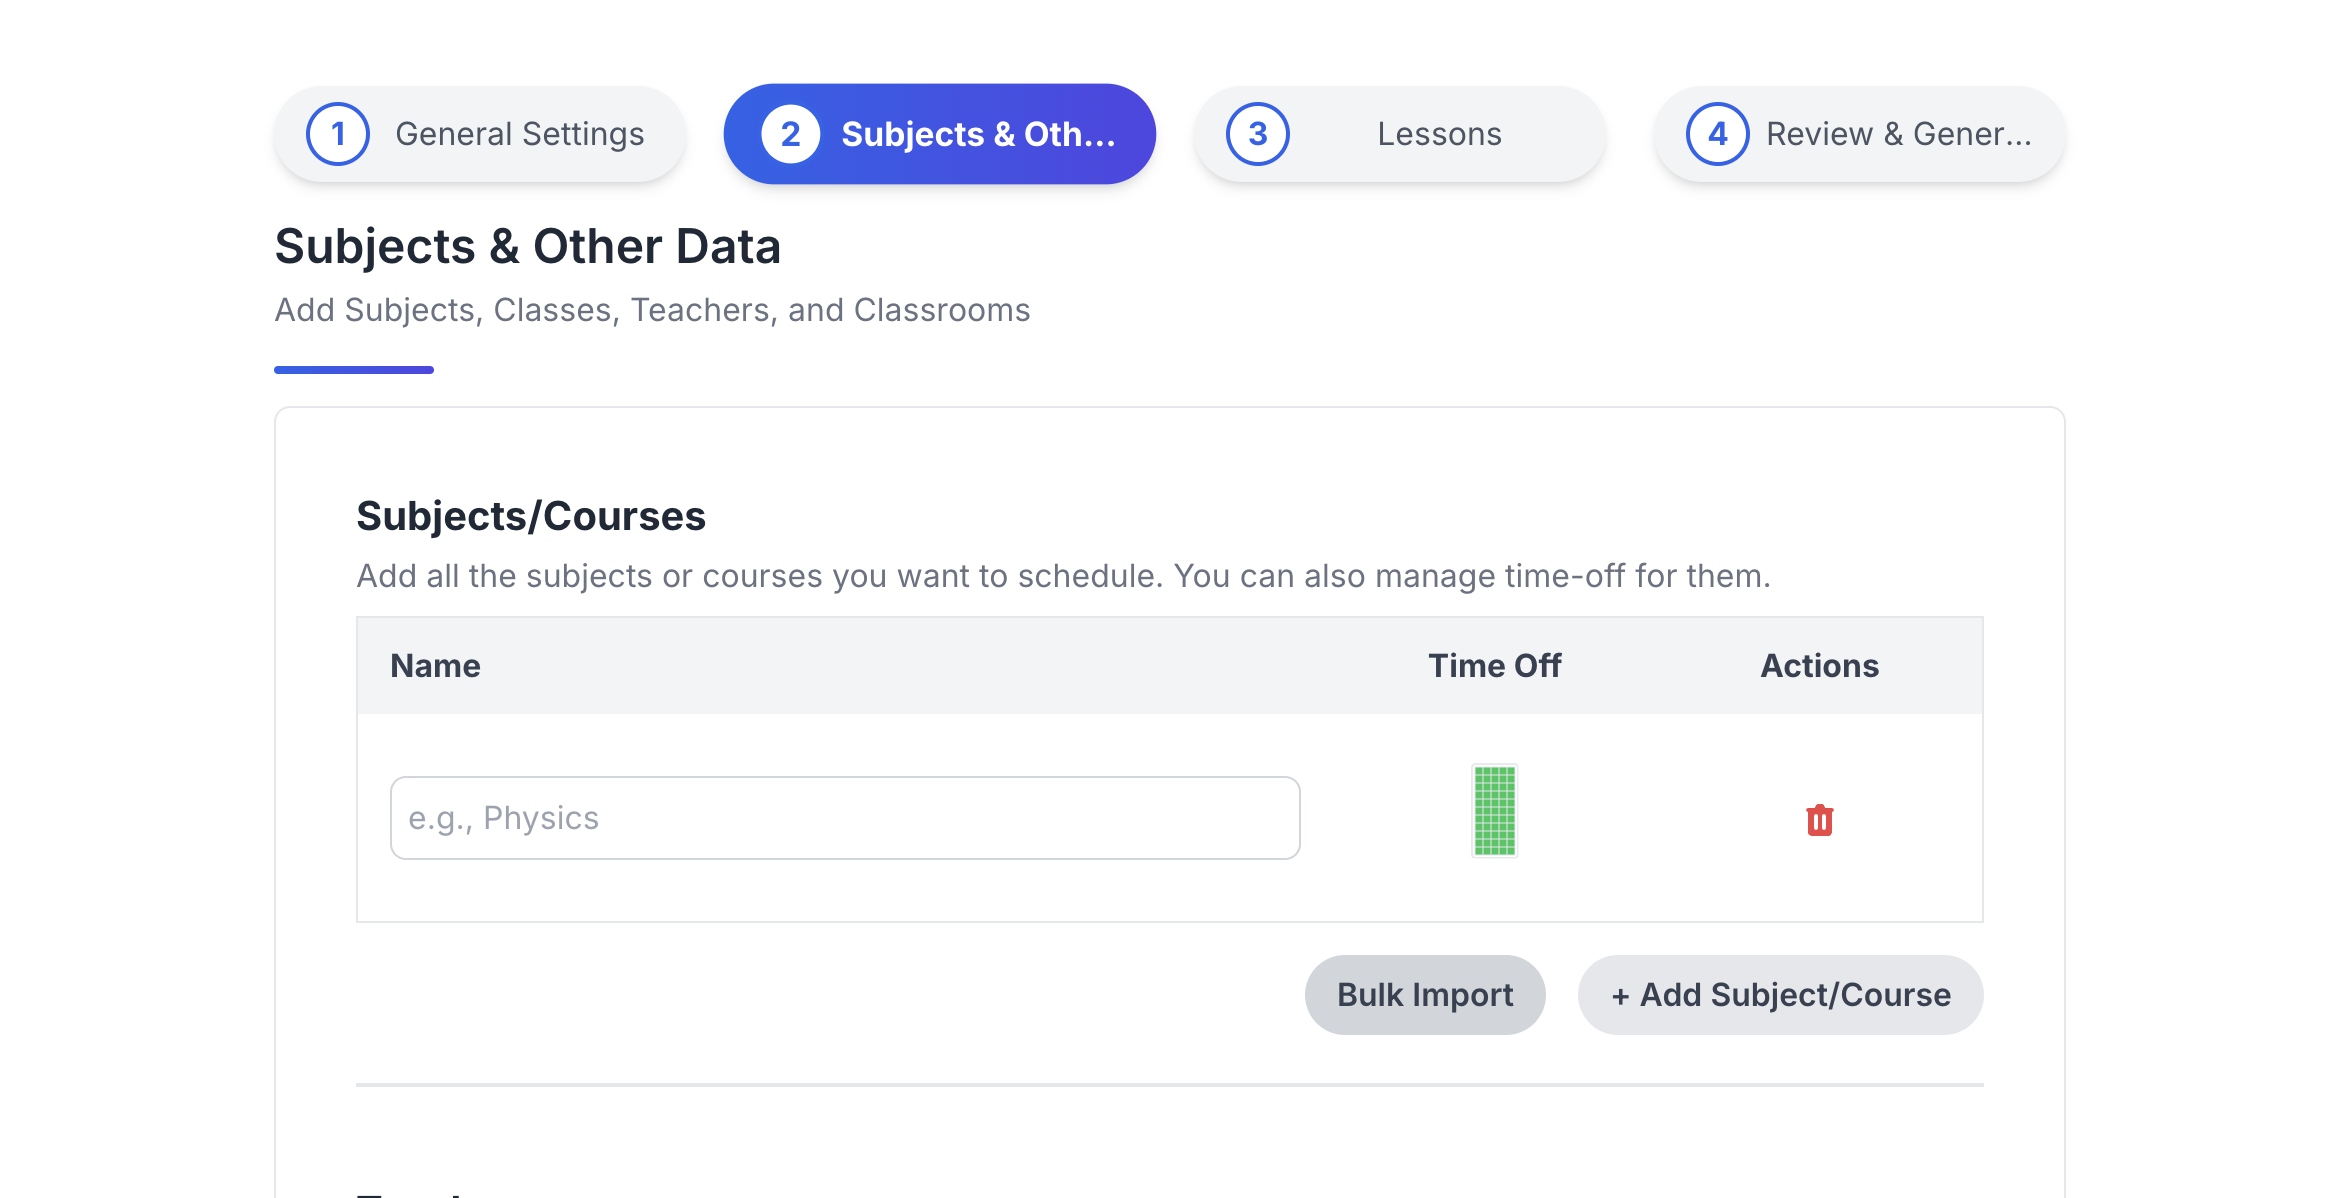
Subject Entry Interface
Key Features:
- Individual or bulk subject addition
- Excel data import capability
- Subject-specific time-off settings
- Special requirements marking
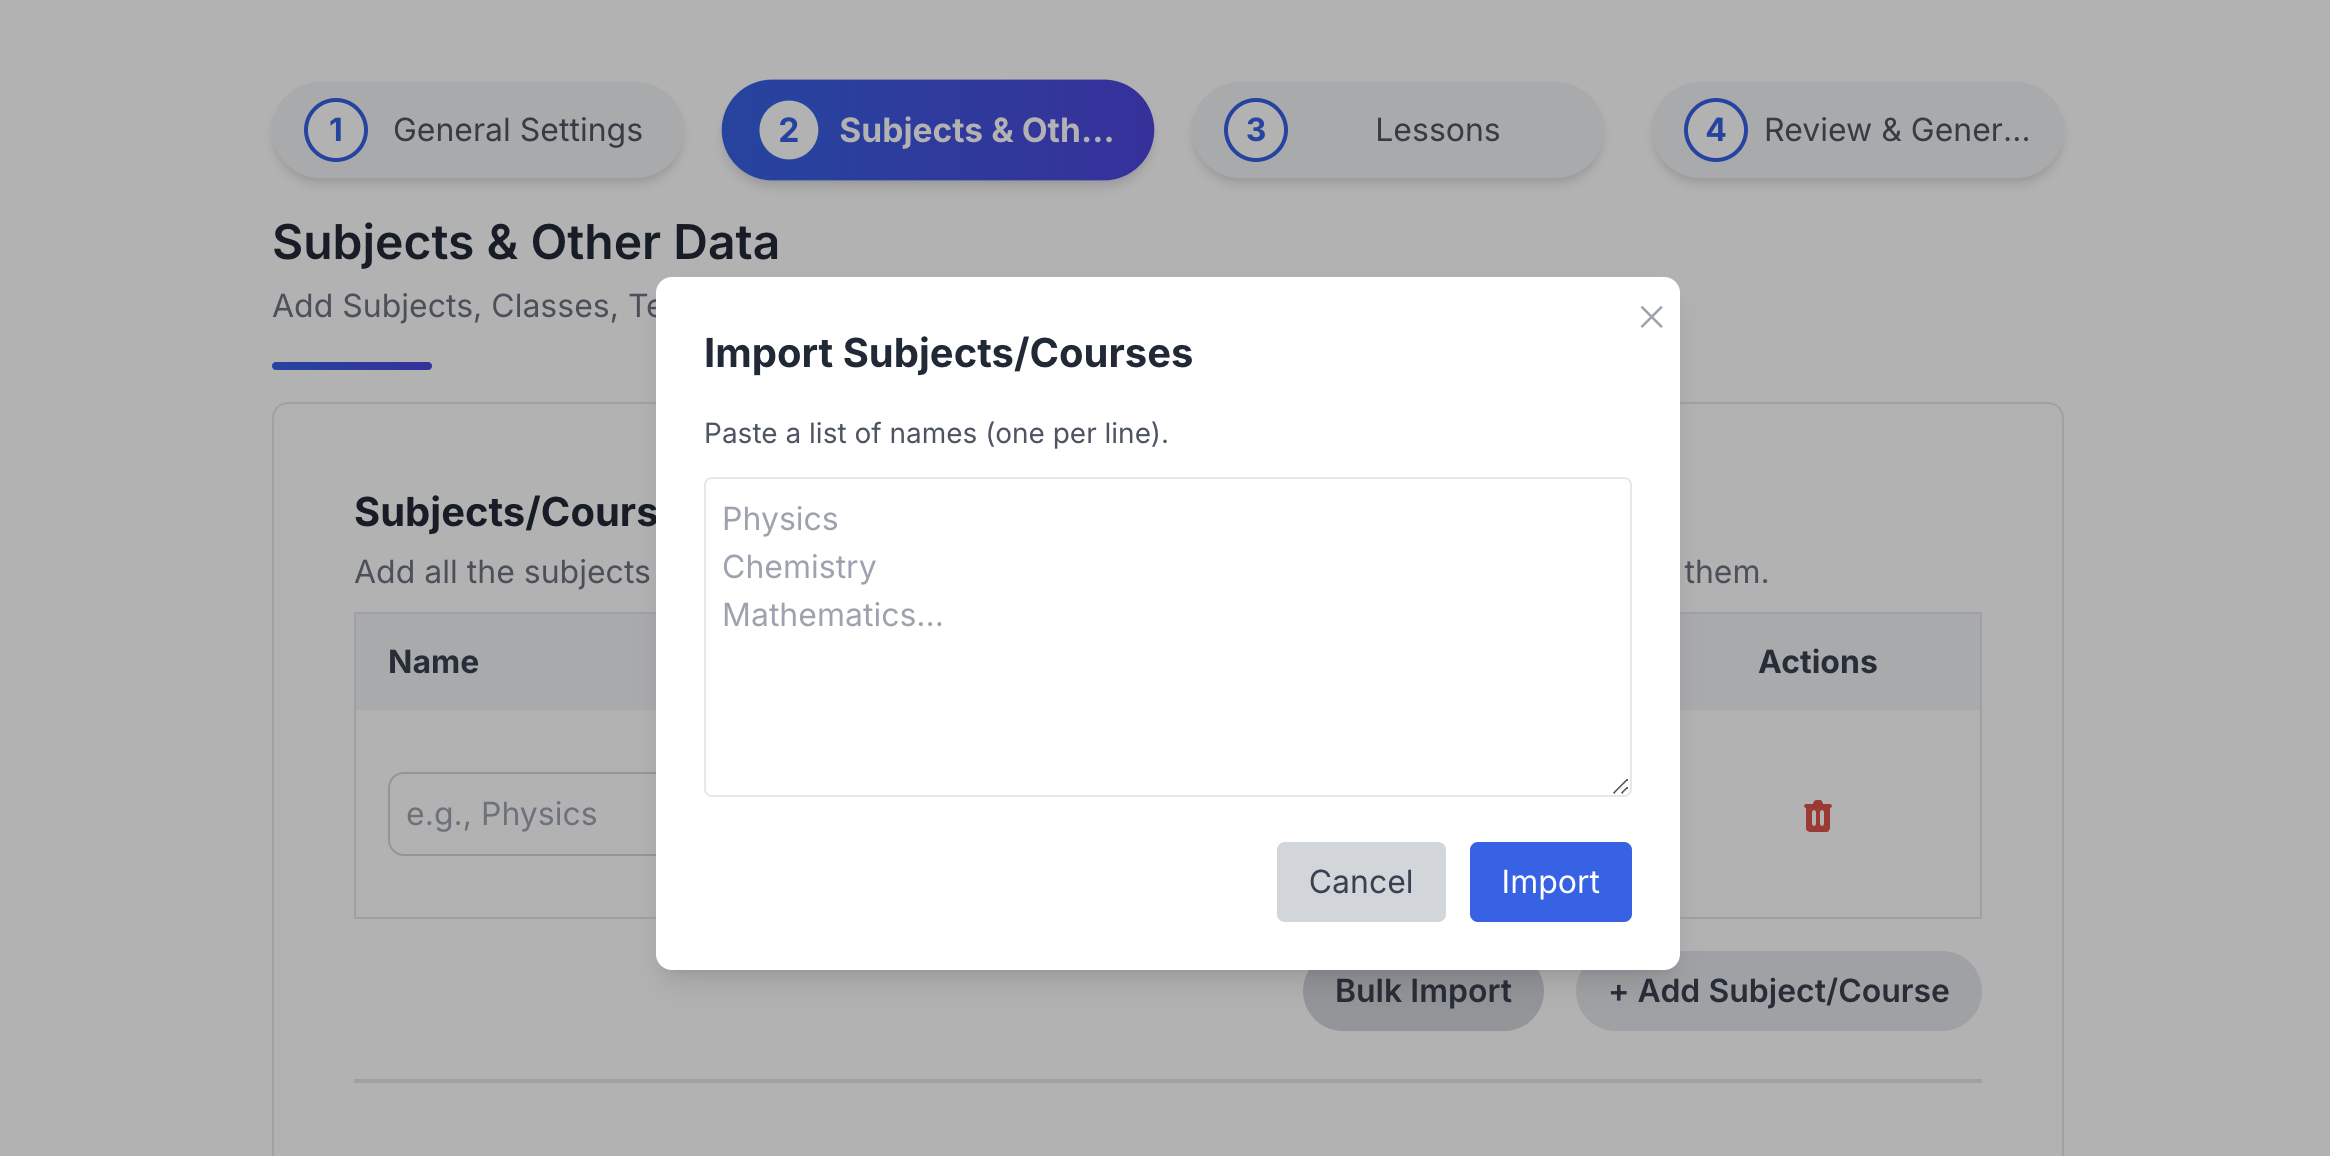
Bulk Import Tool
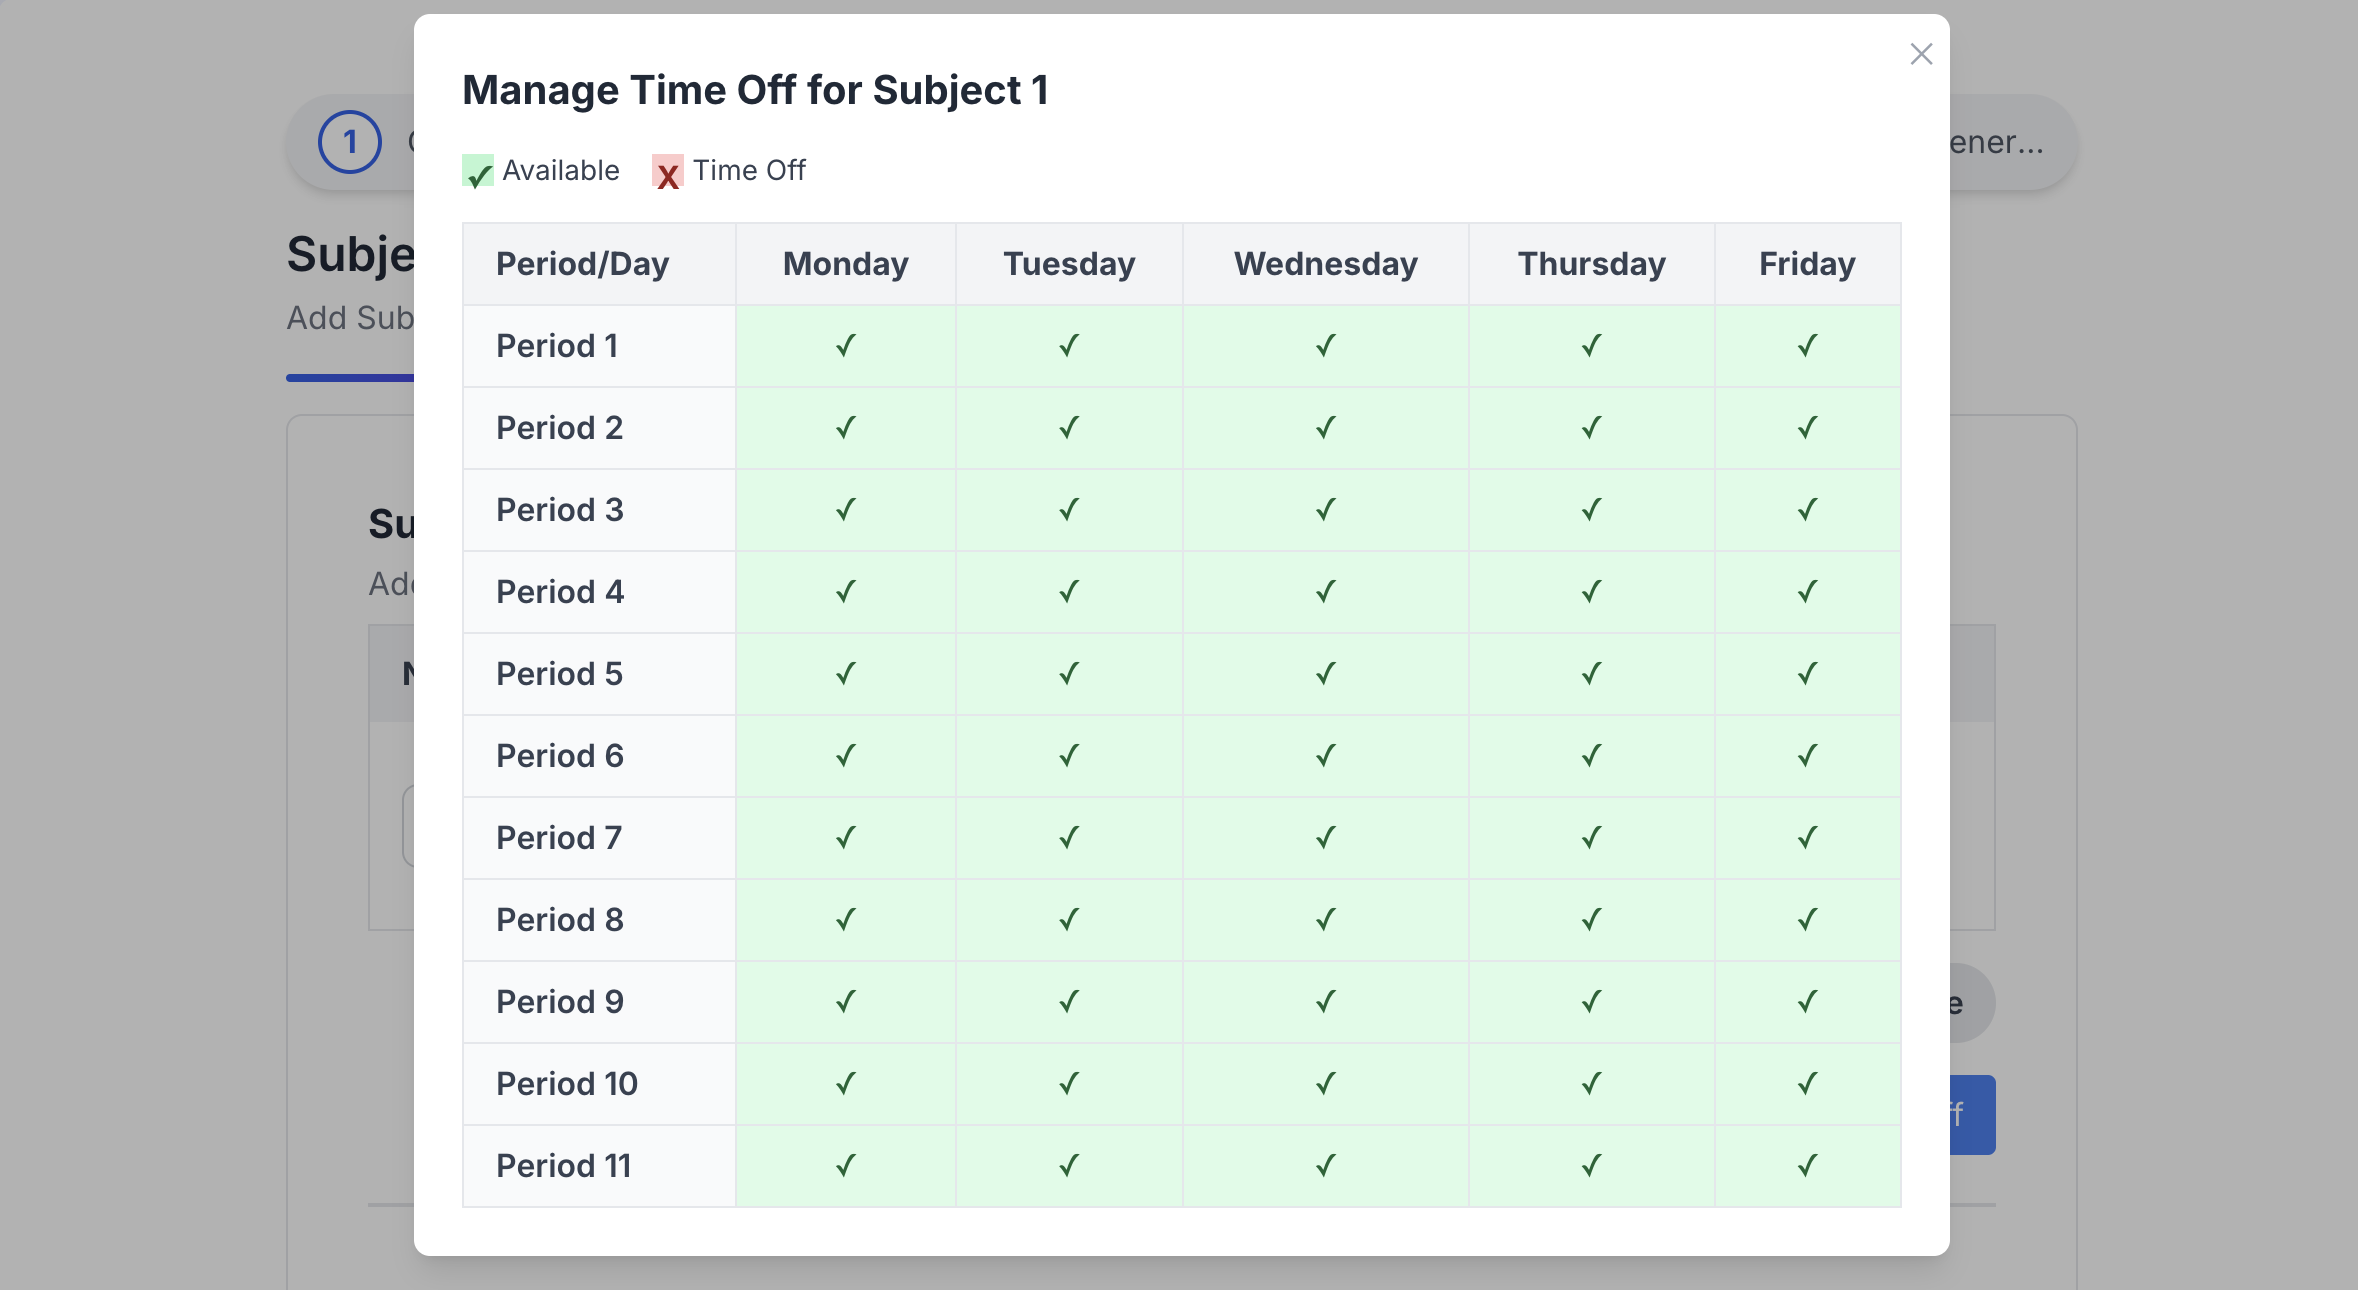
Time-off Settings
Results View:
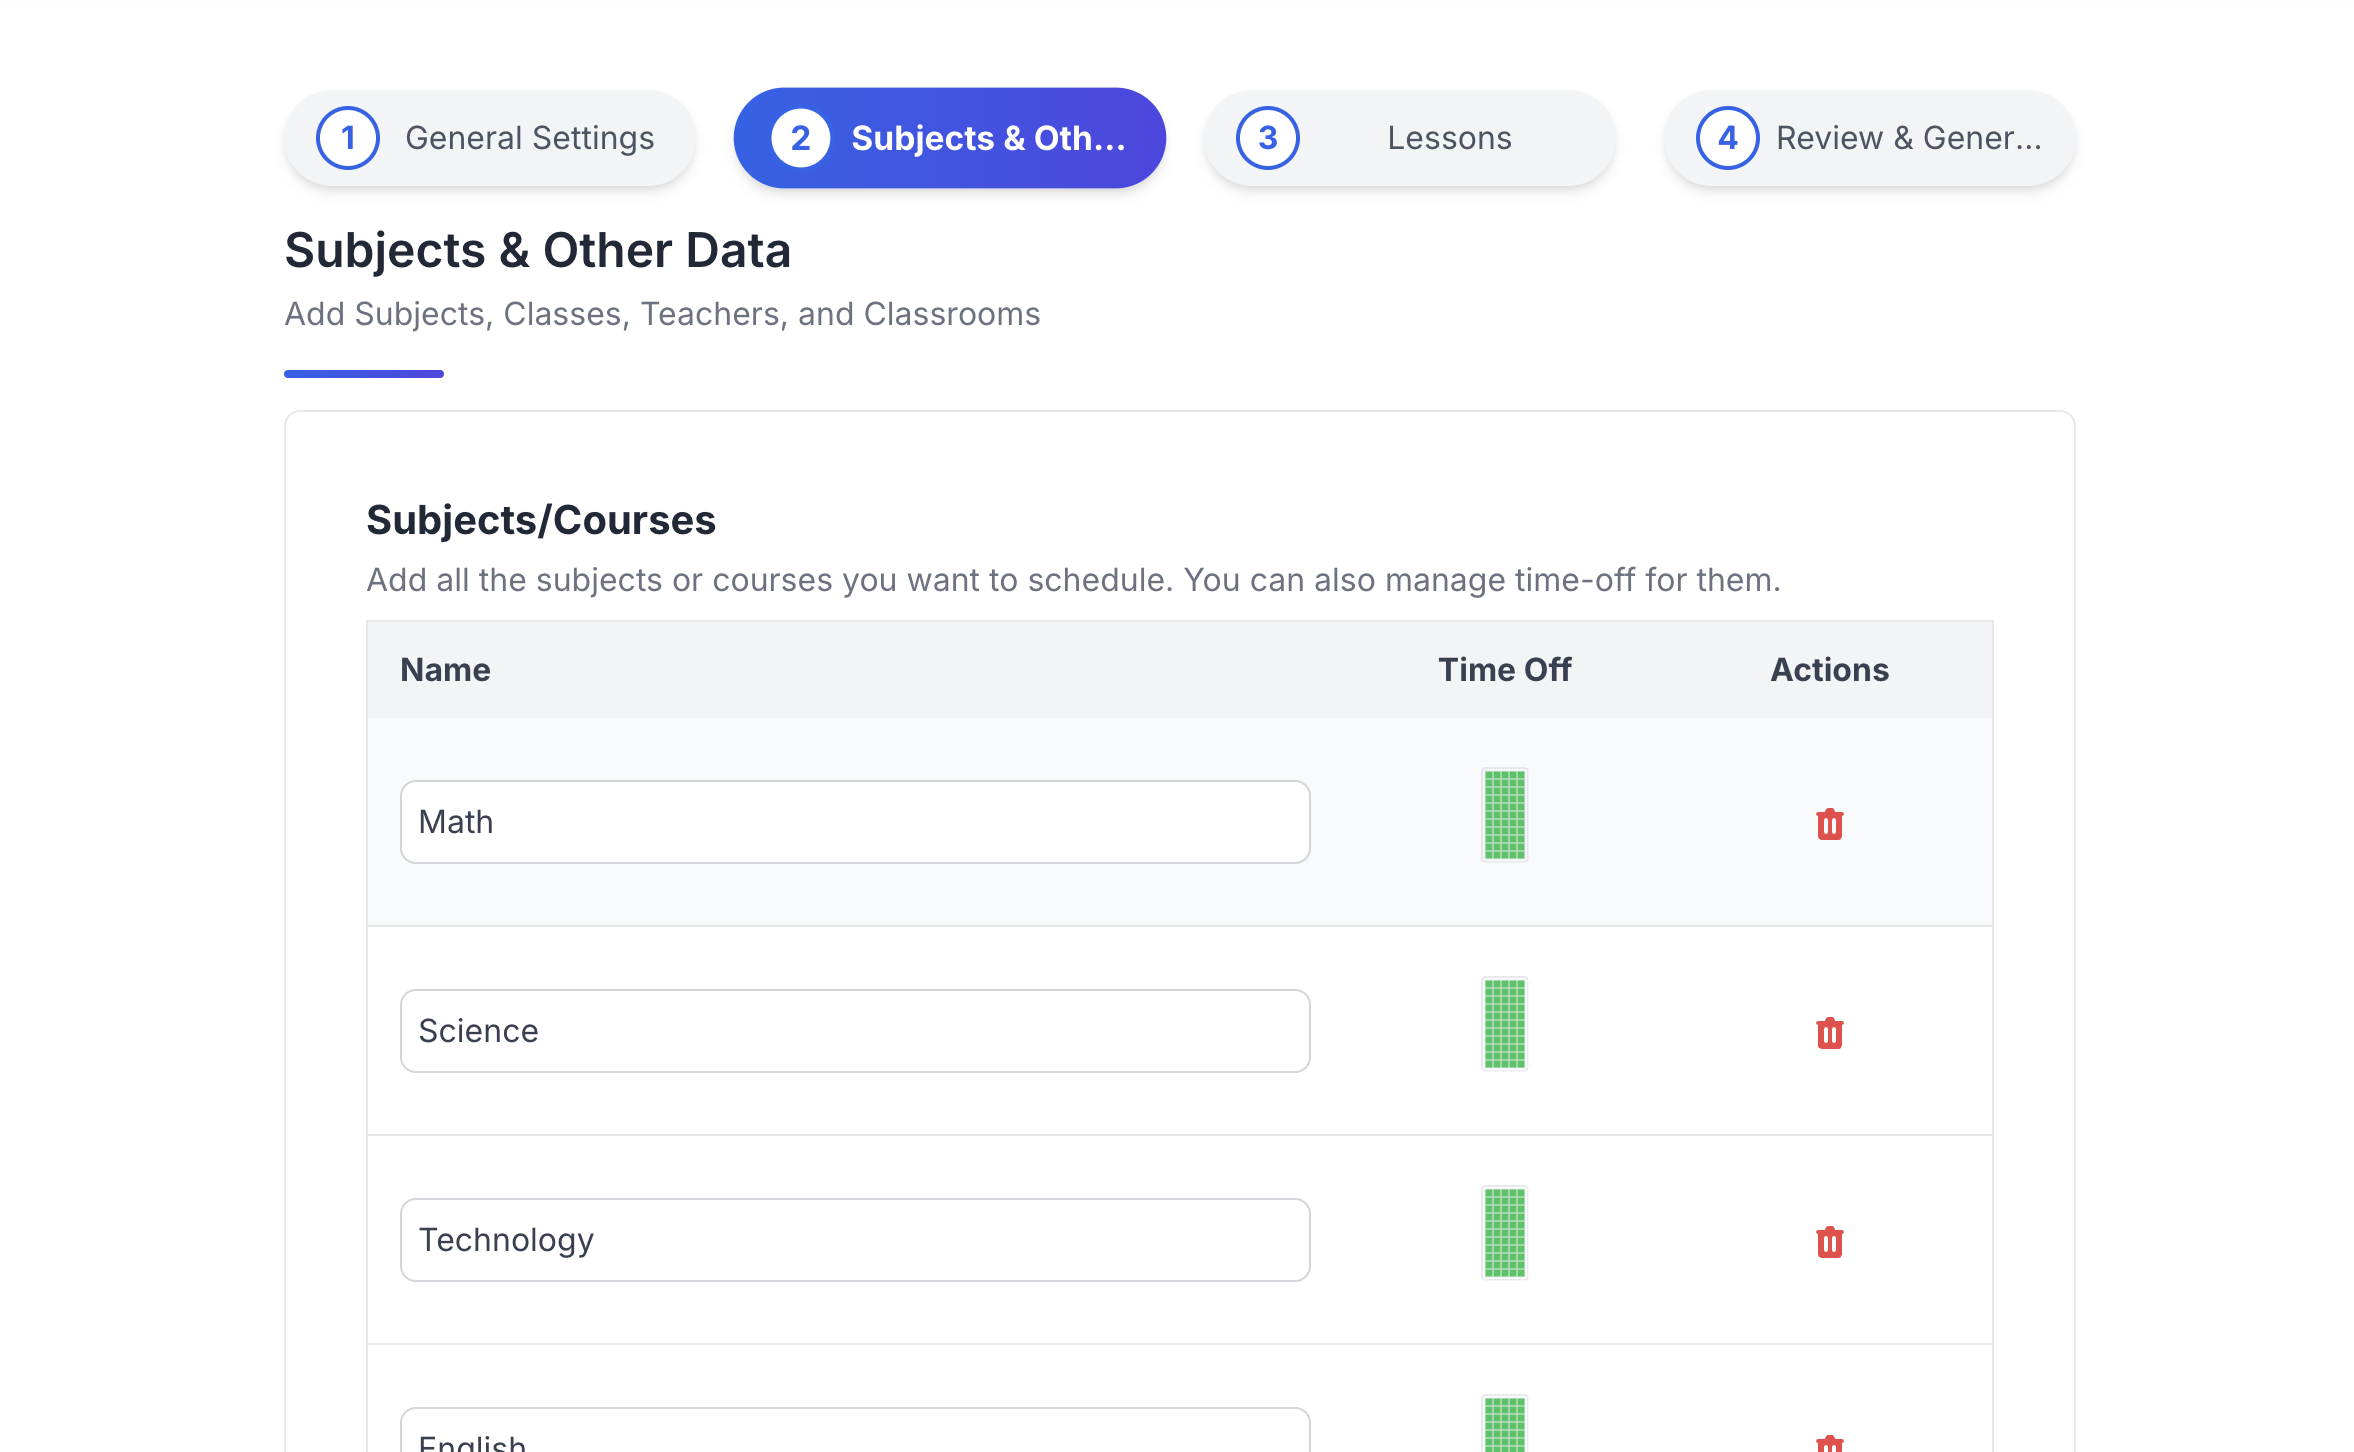
Completed Subjects
Step 3: Teacher Management
Efficient teacher allocation is crucial for a successful timetable:
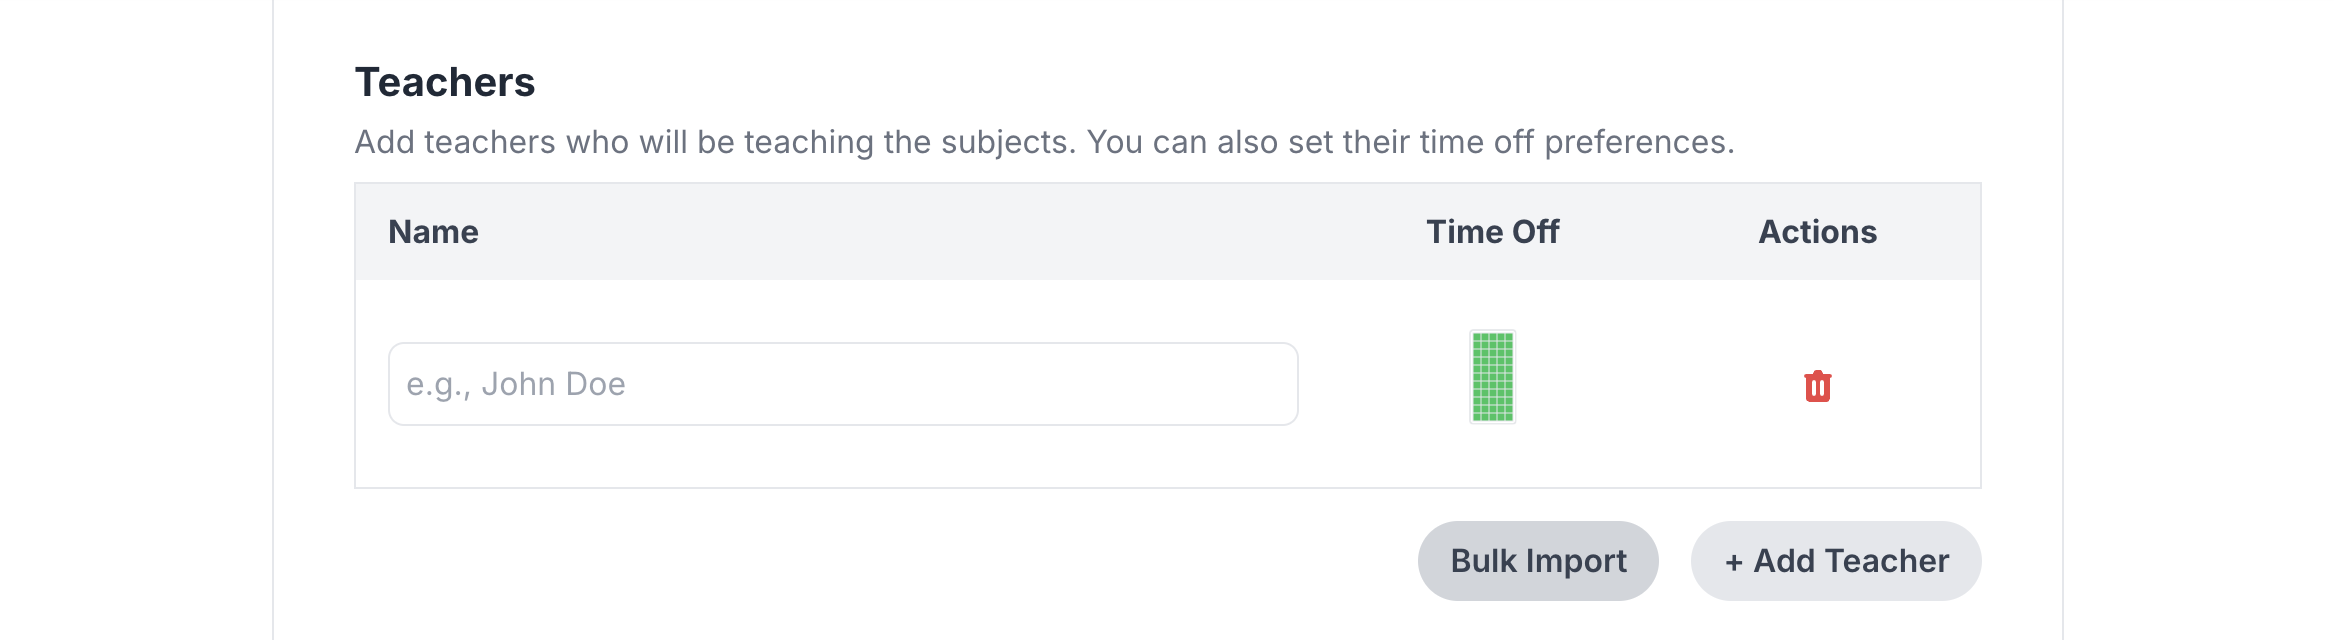
Teacher Entry Screen
Features Include:
- Individual teacher profiles
- Availability settings
- Subject expertise marking
- Maximum hours configuration
After Setup:
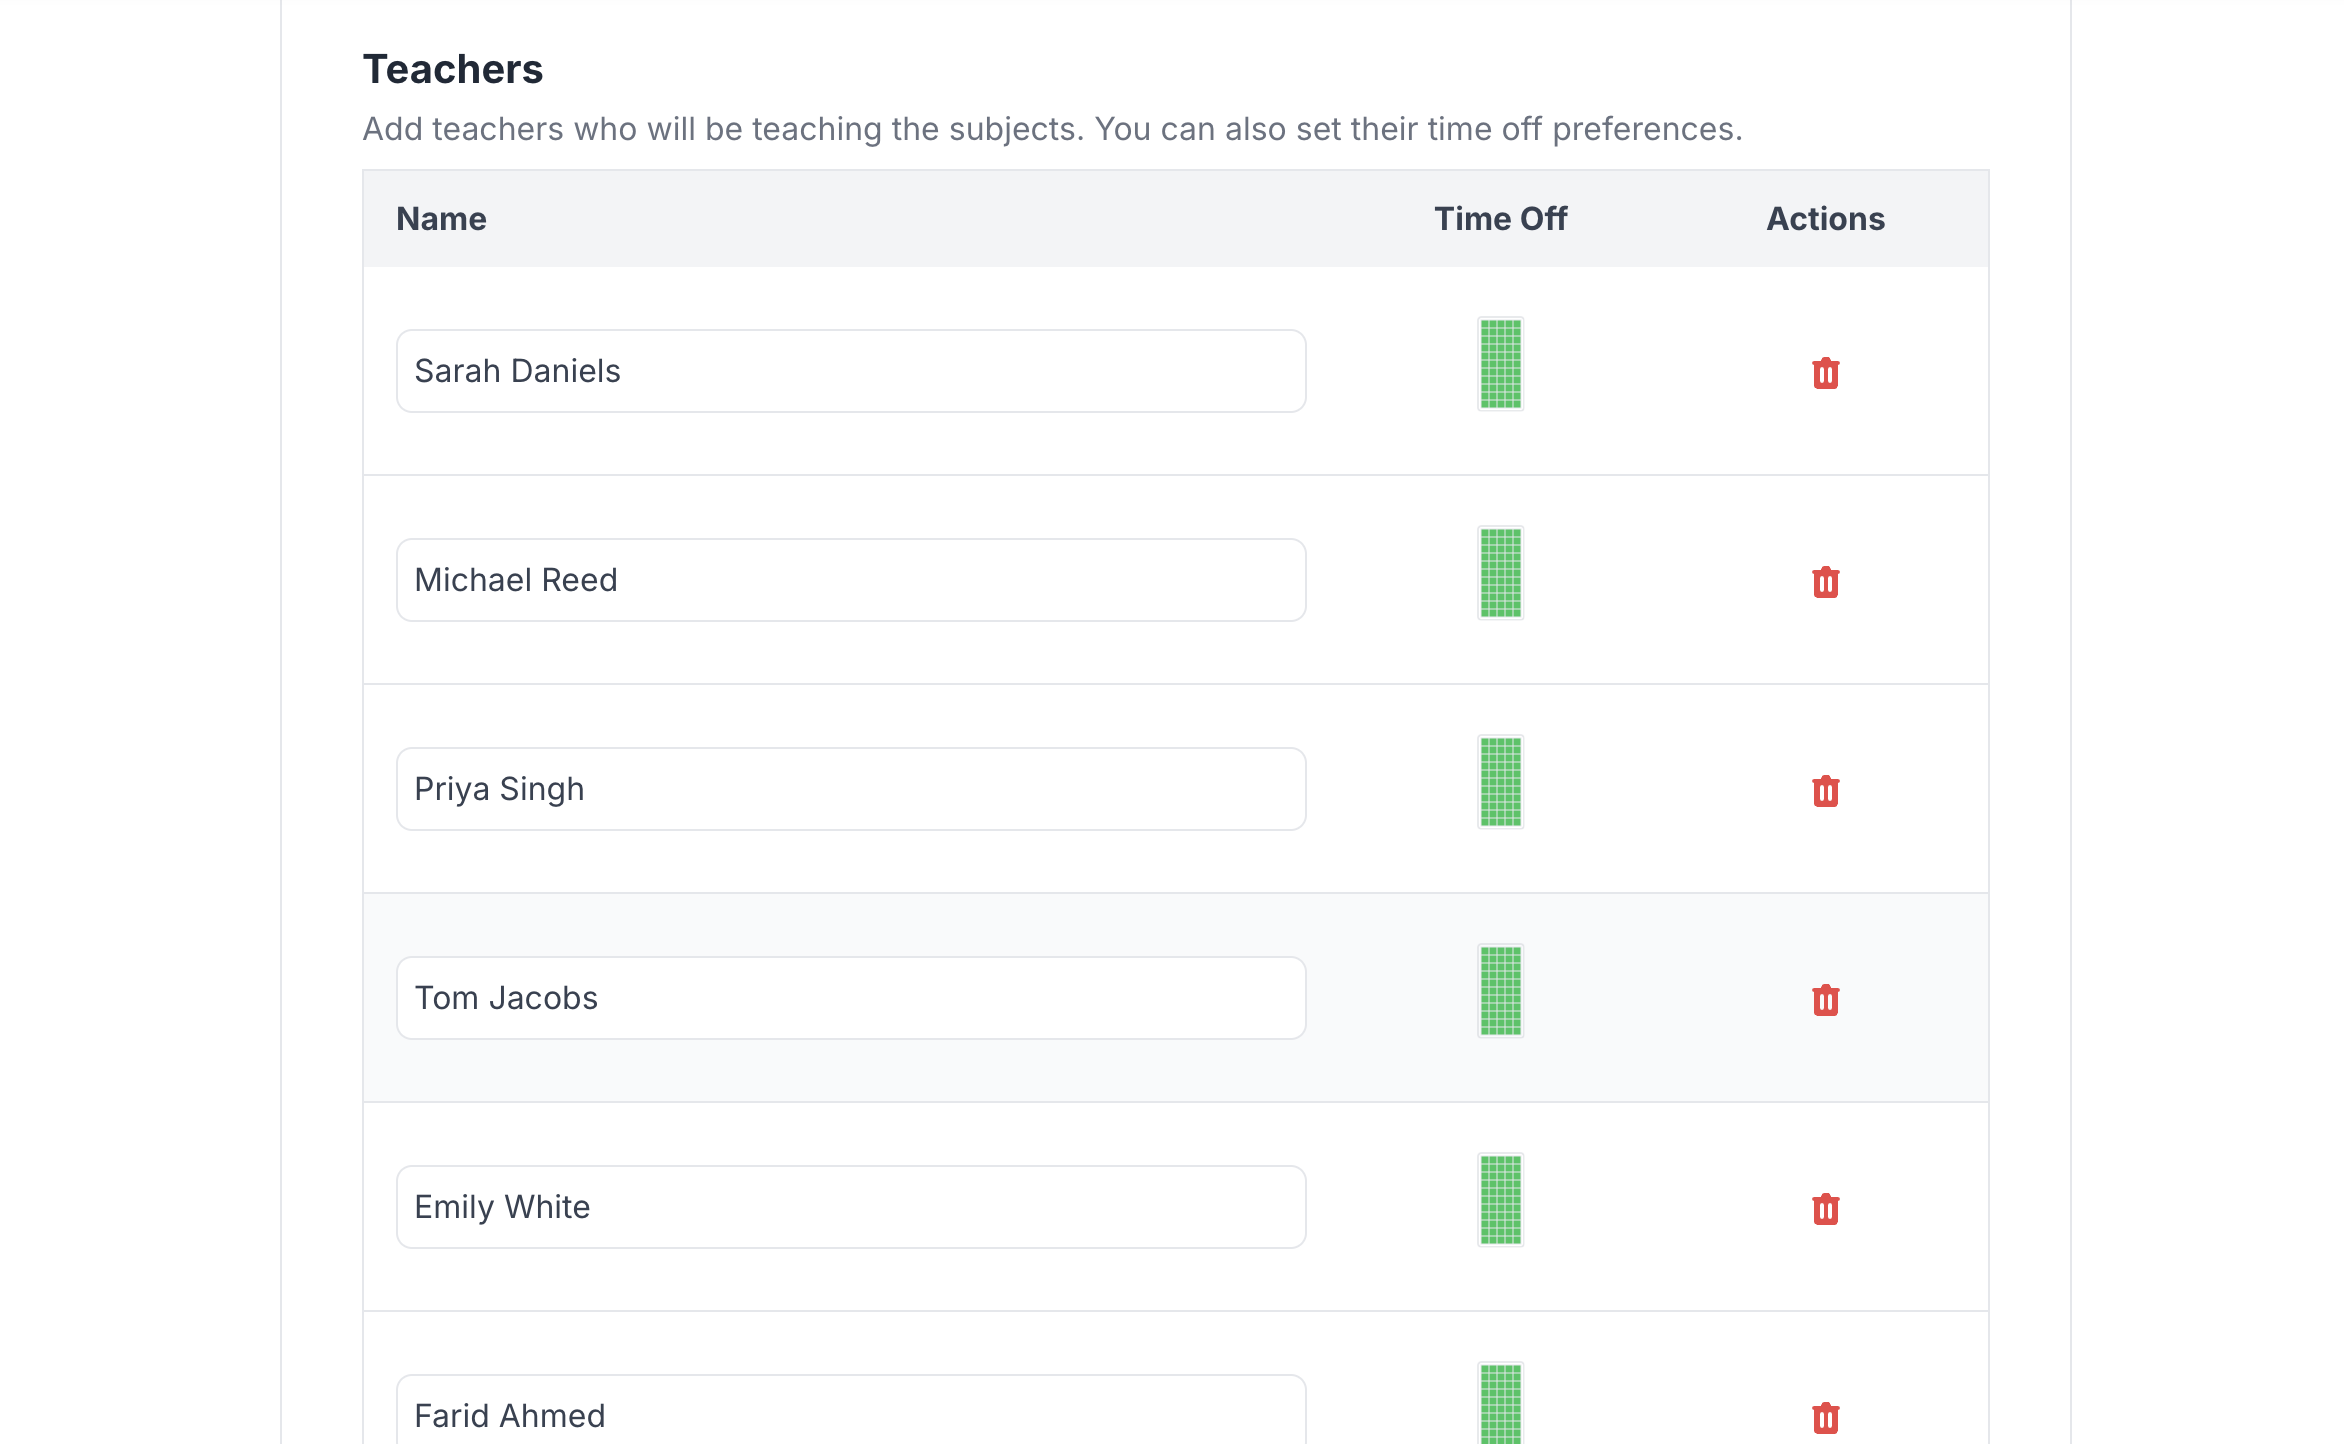
Teacher List Complete
Step 4: Class Organization
Proper class setup ensures every student group is accounted for:
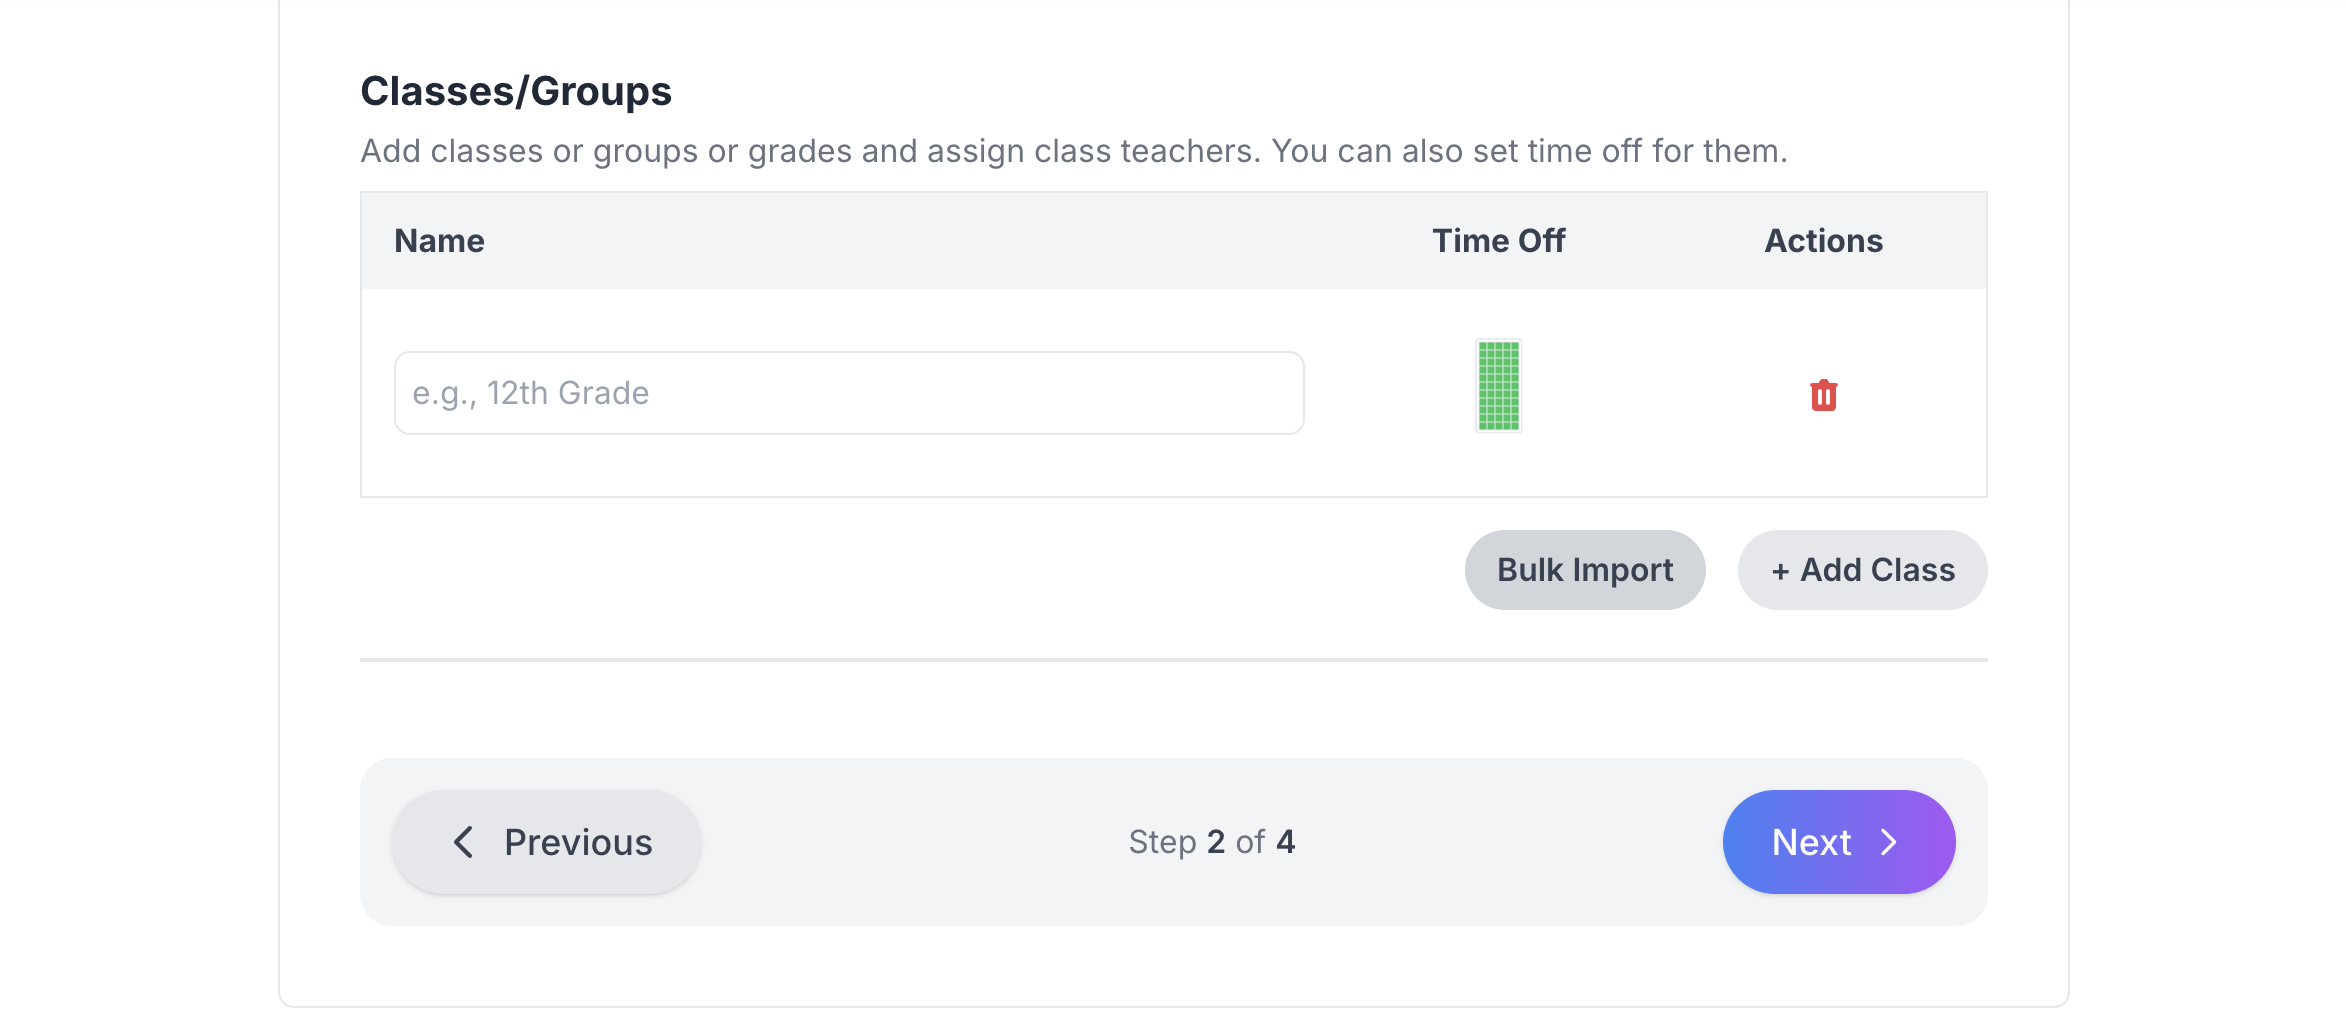
Class Setup Interface
Key Aspects:
- Class naming and identification
- Section management
- Special requirements marking
- Time-off settings when needed
Completed Setup:
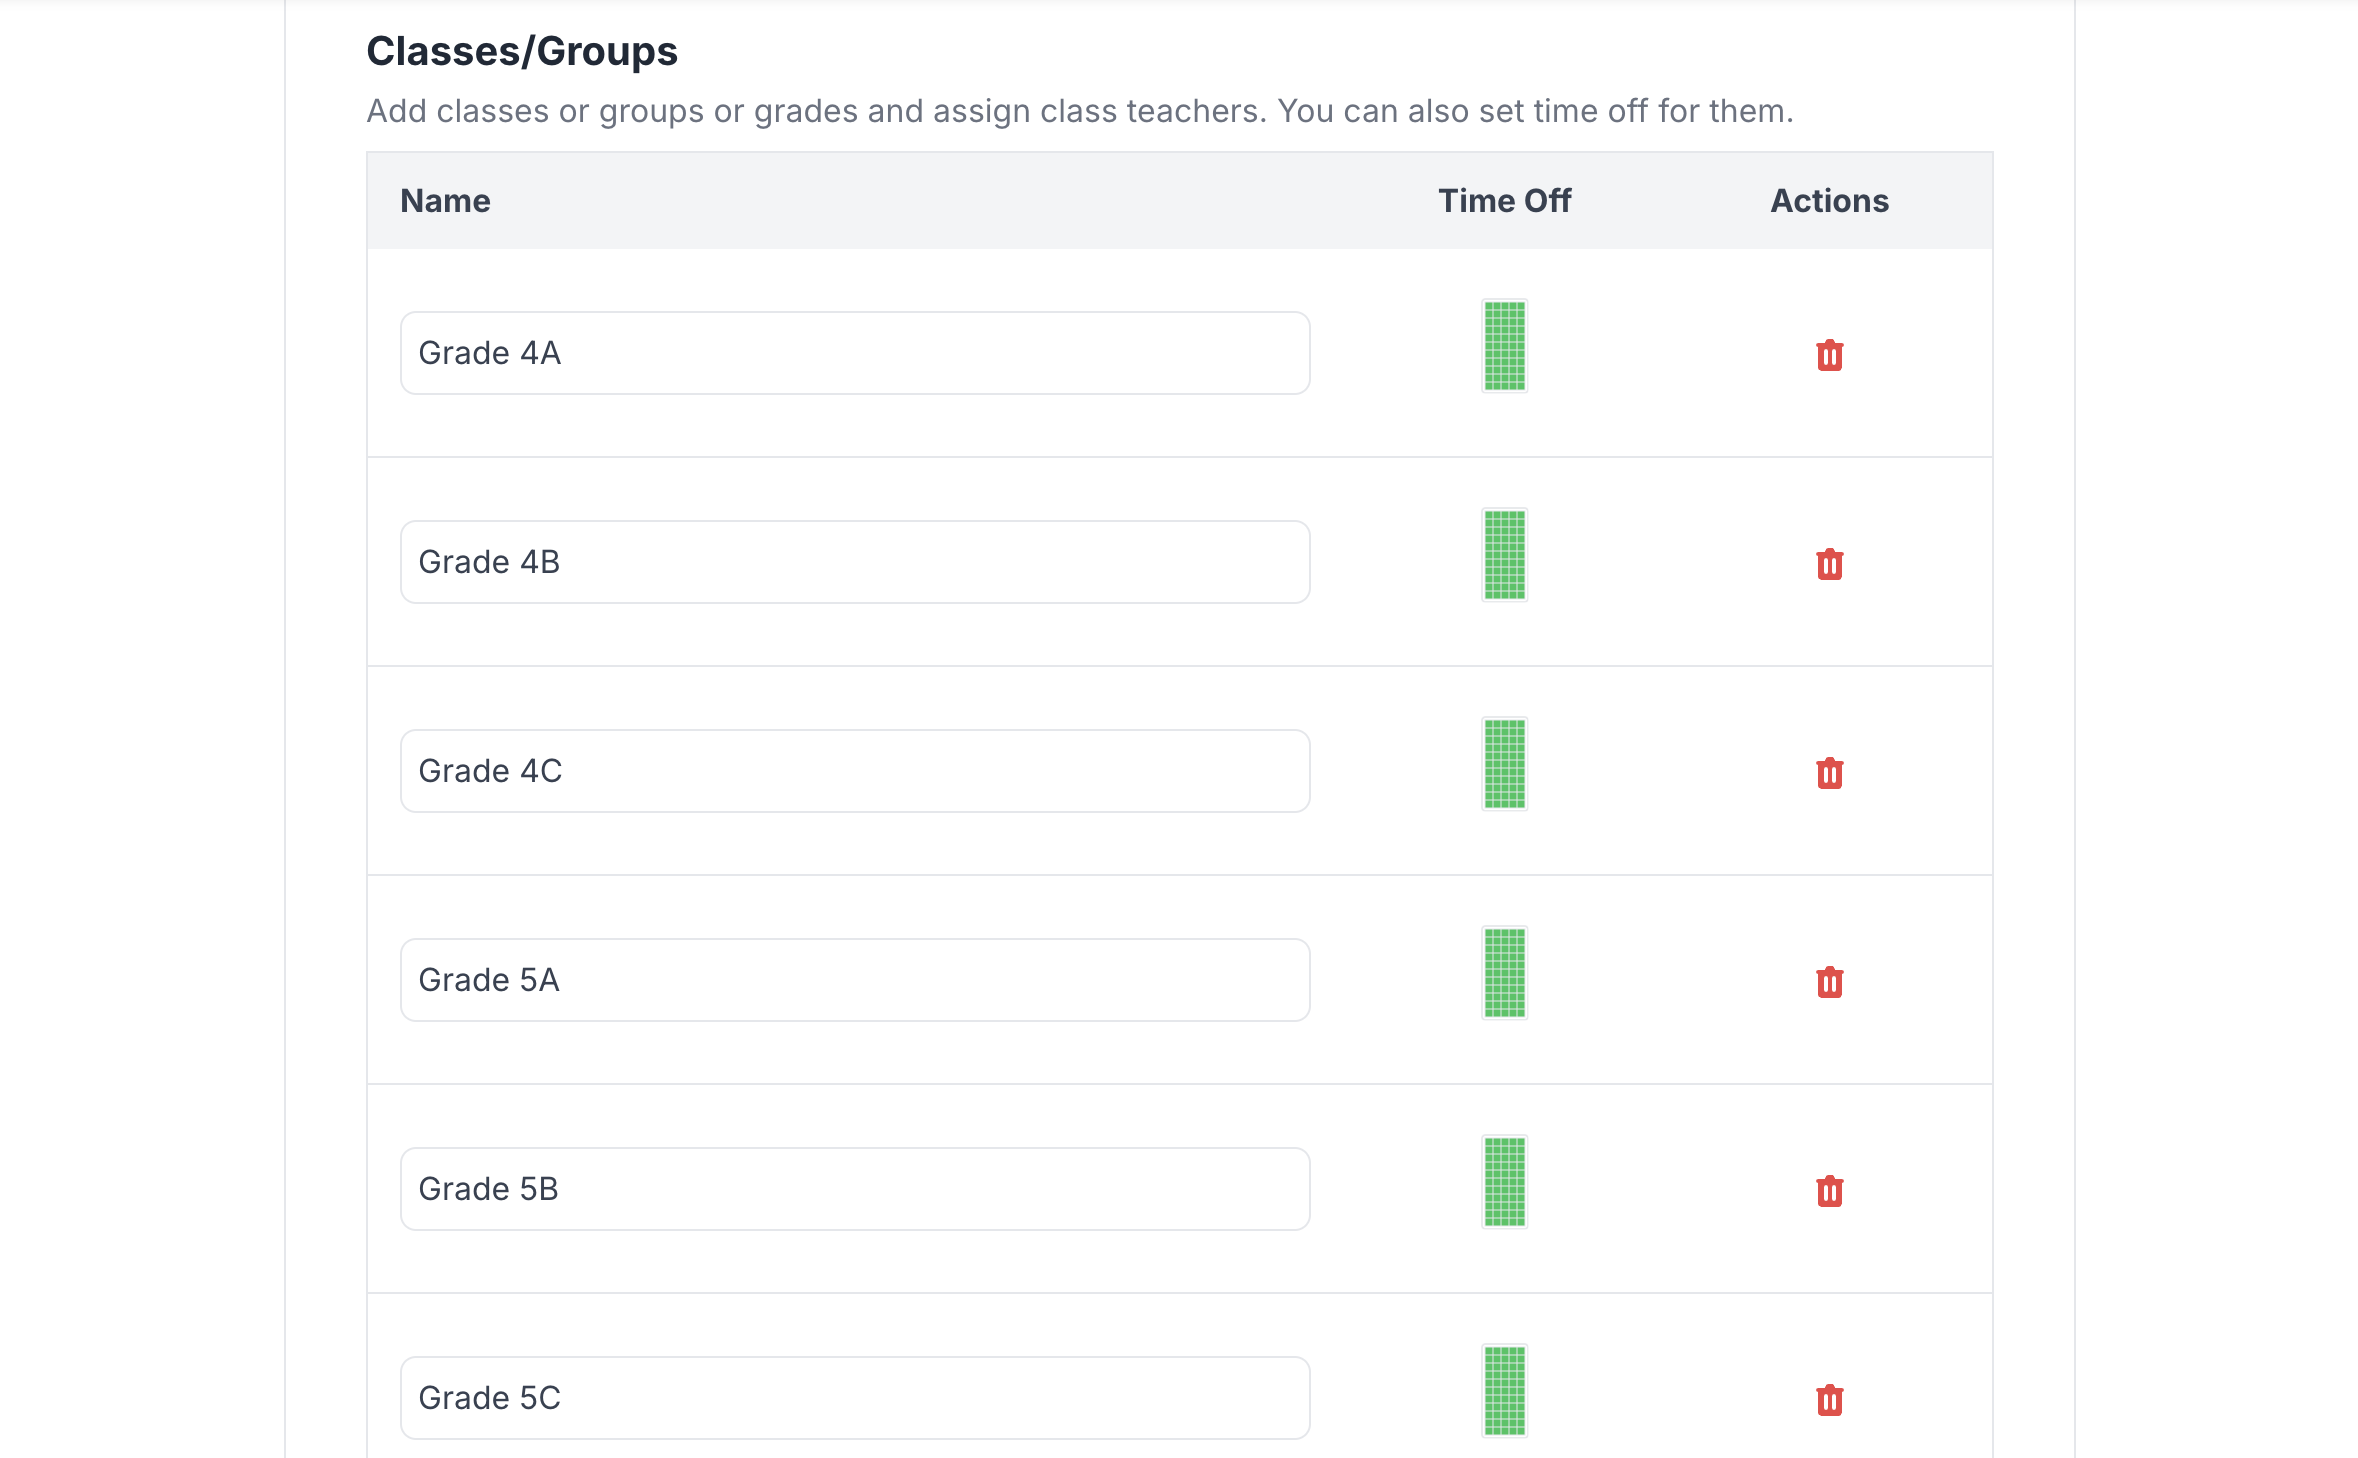
Classes Added
Step 5: Lesson Assignment
This critical step connects teachers, subjects, and classes:
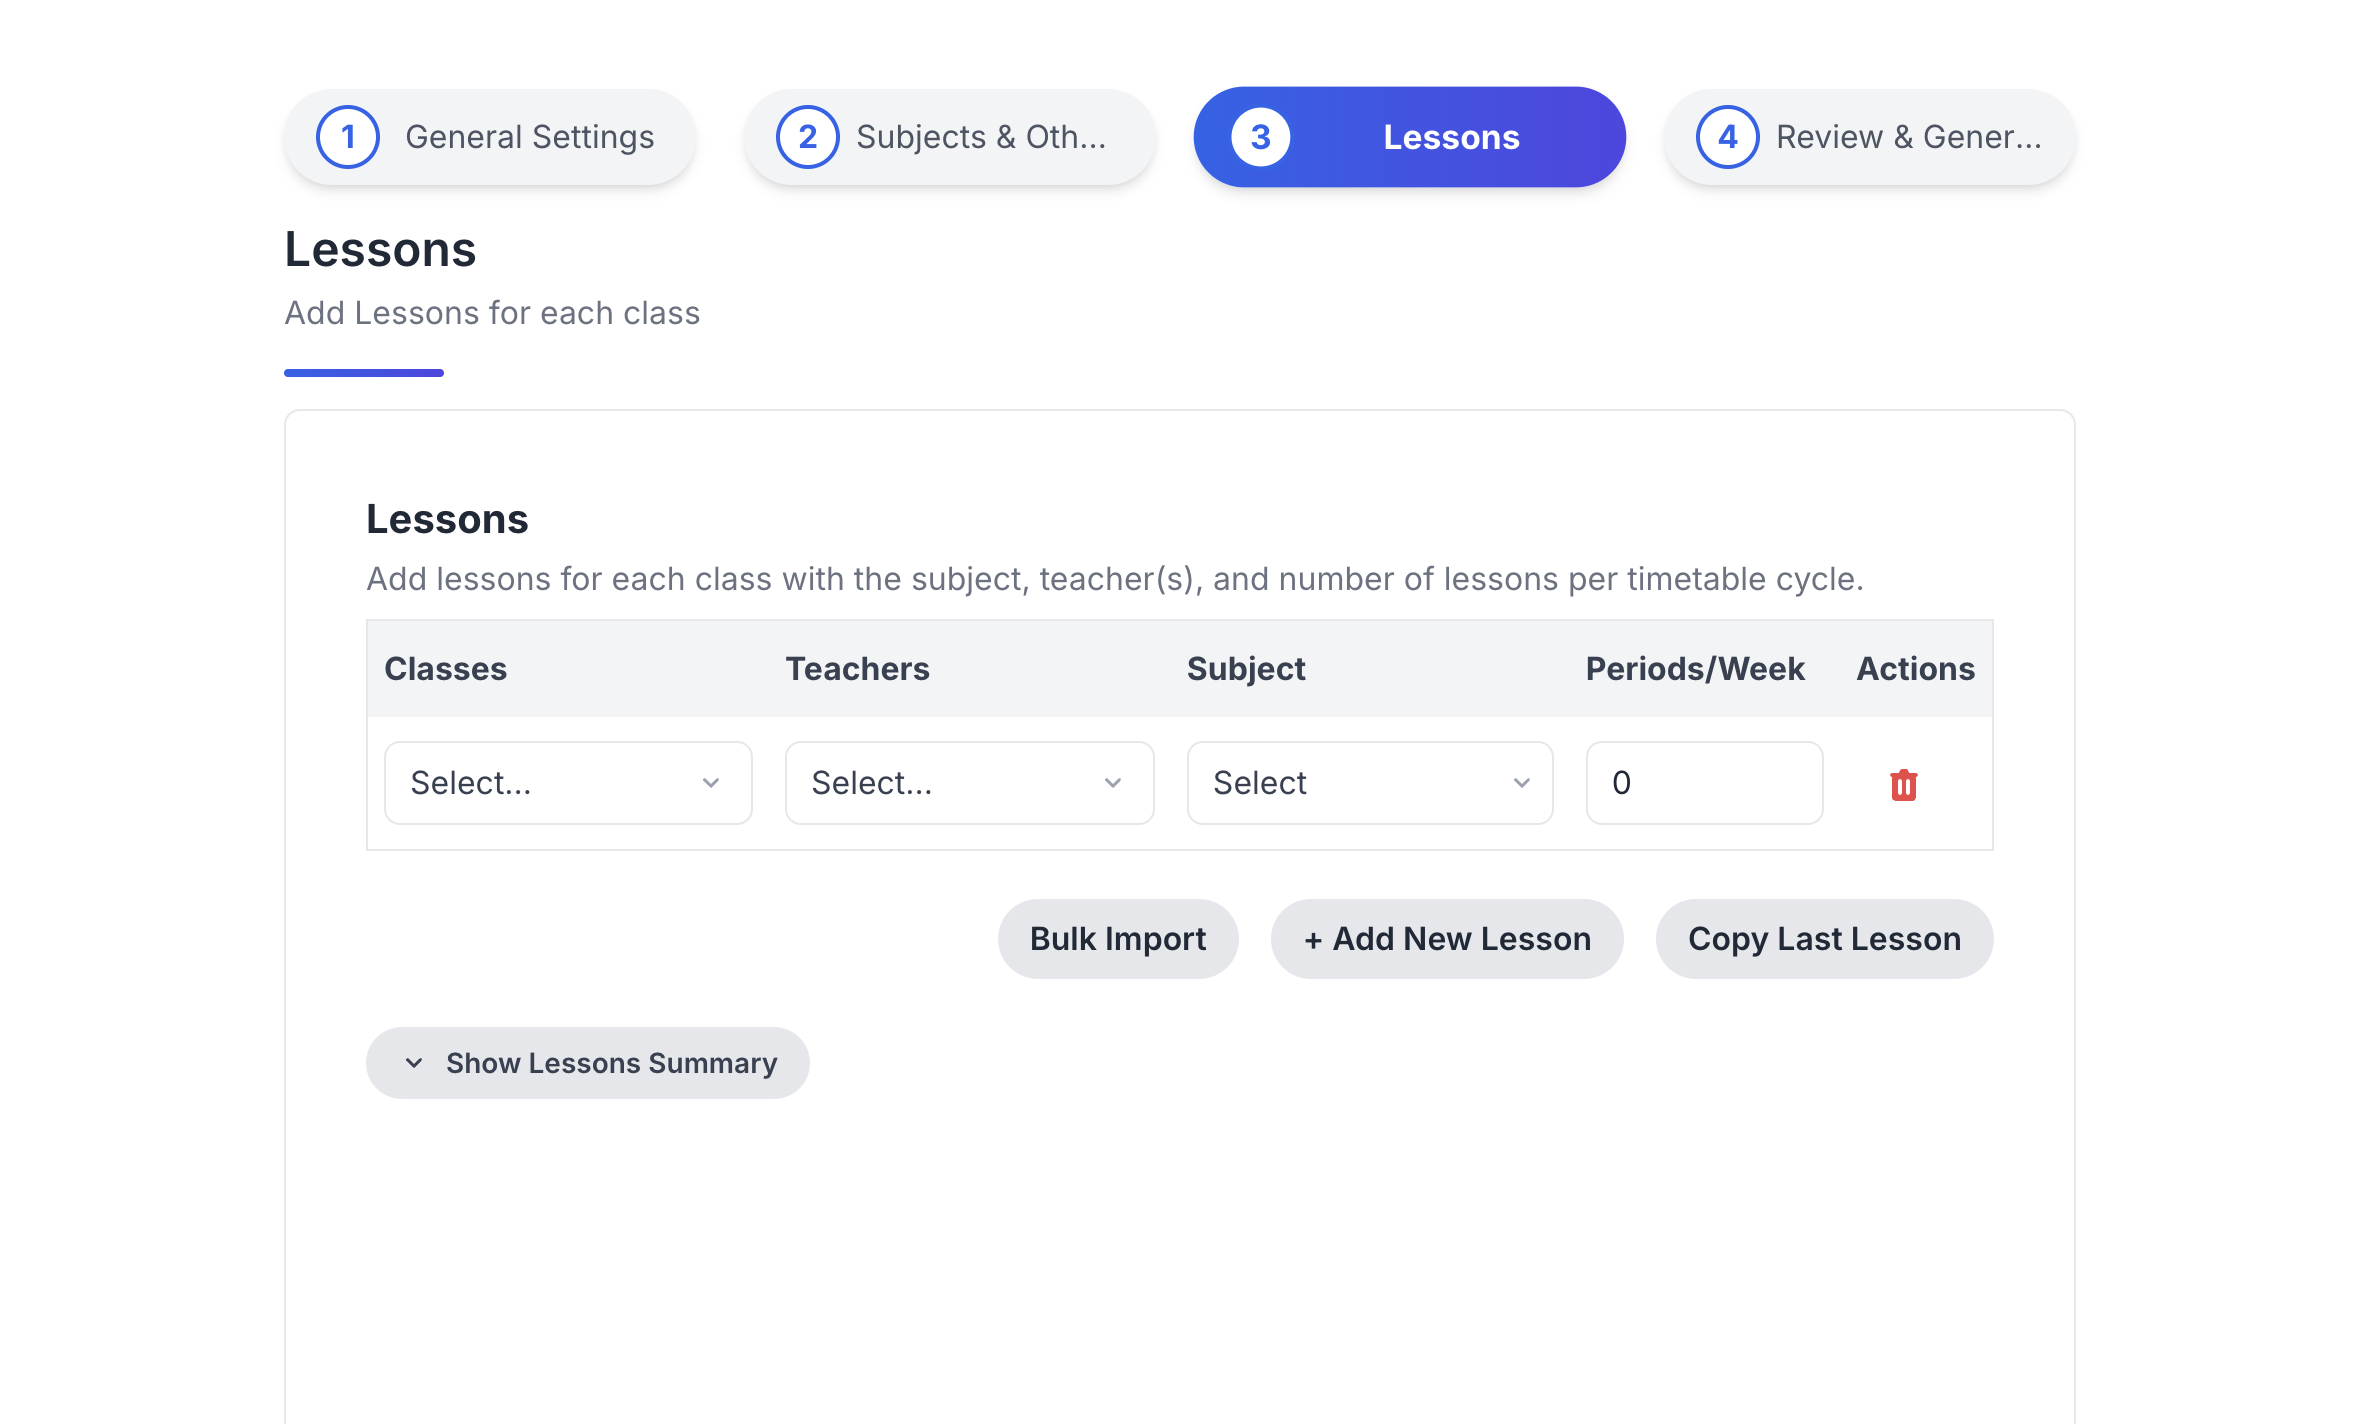
Lesson Entry Interface
Sample Data Format:
Teacher Name, Class Name, Subject, Number of Lessons
Sarah Daniels, Grade 5A, Math, 12
Michael Reed, Grade 6A, Math, 12
Tom Jacobs, Grade 7A, Math, 9
Process Views:
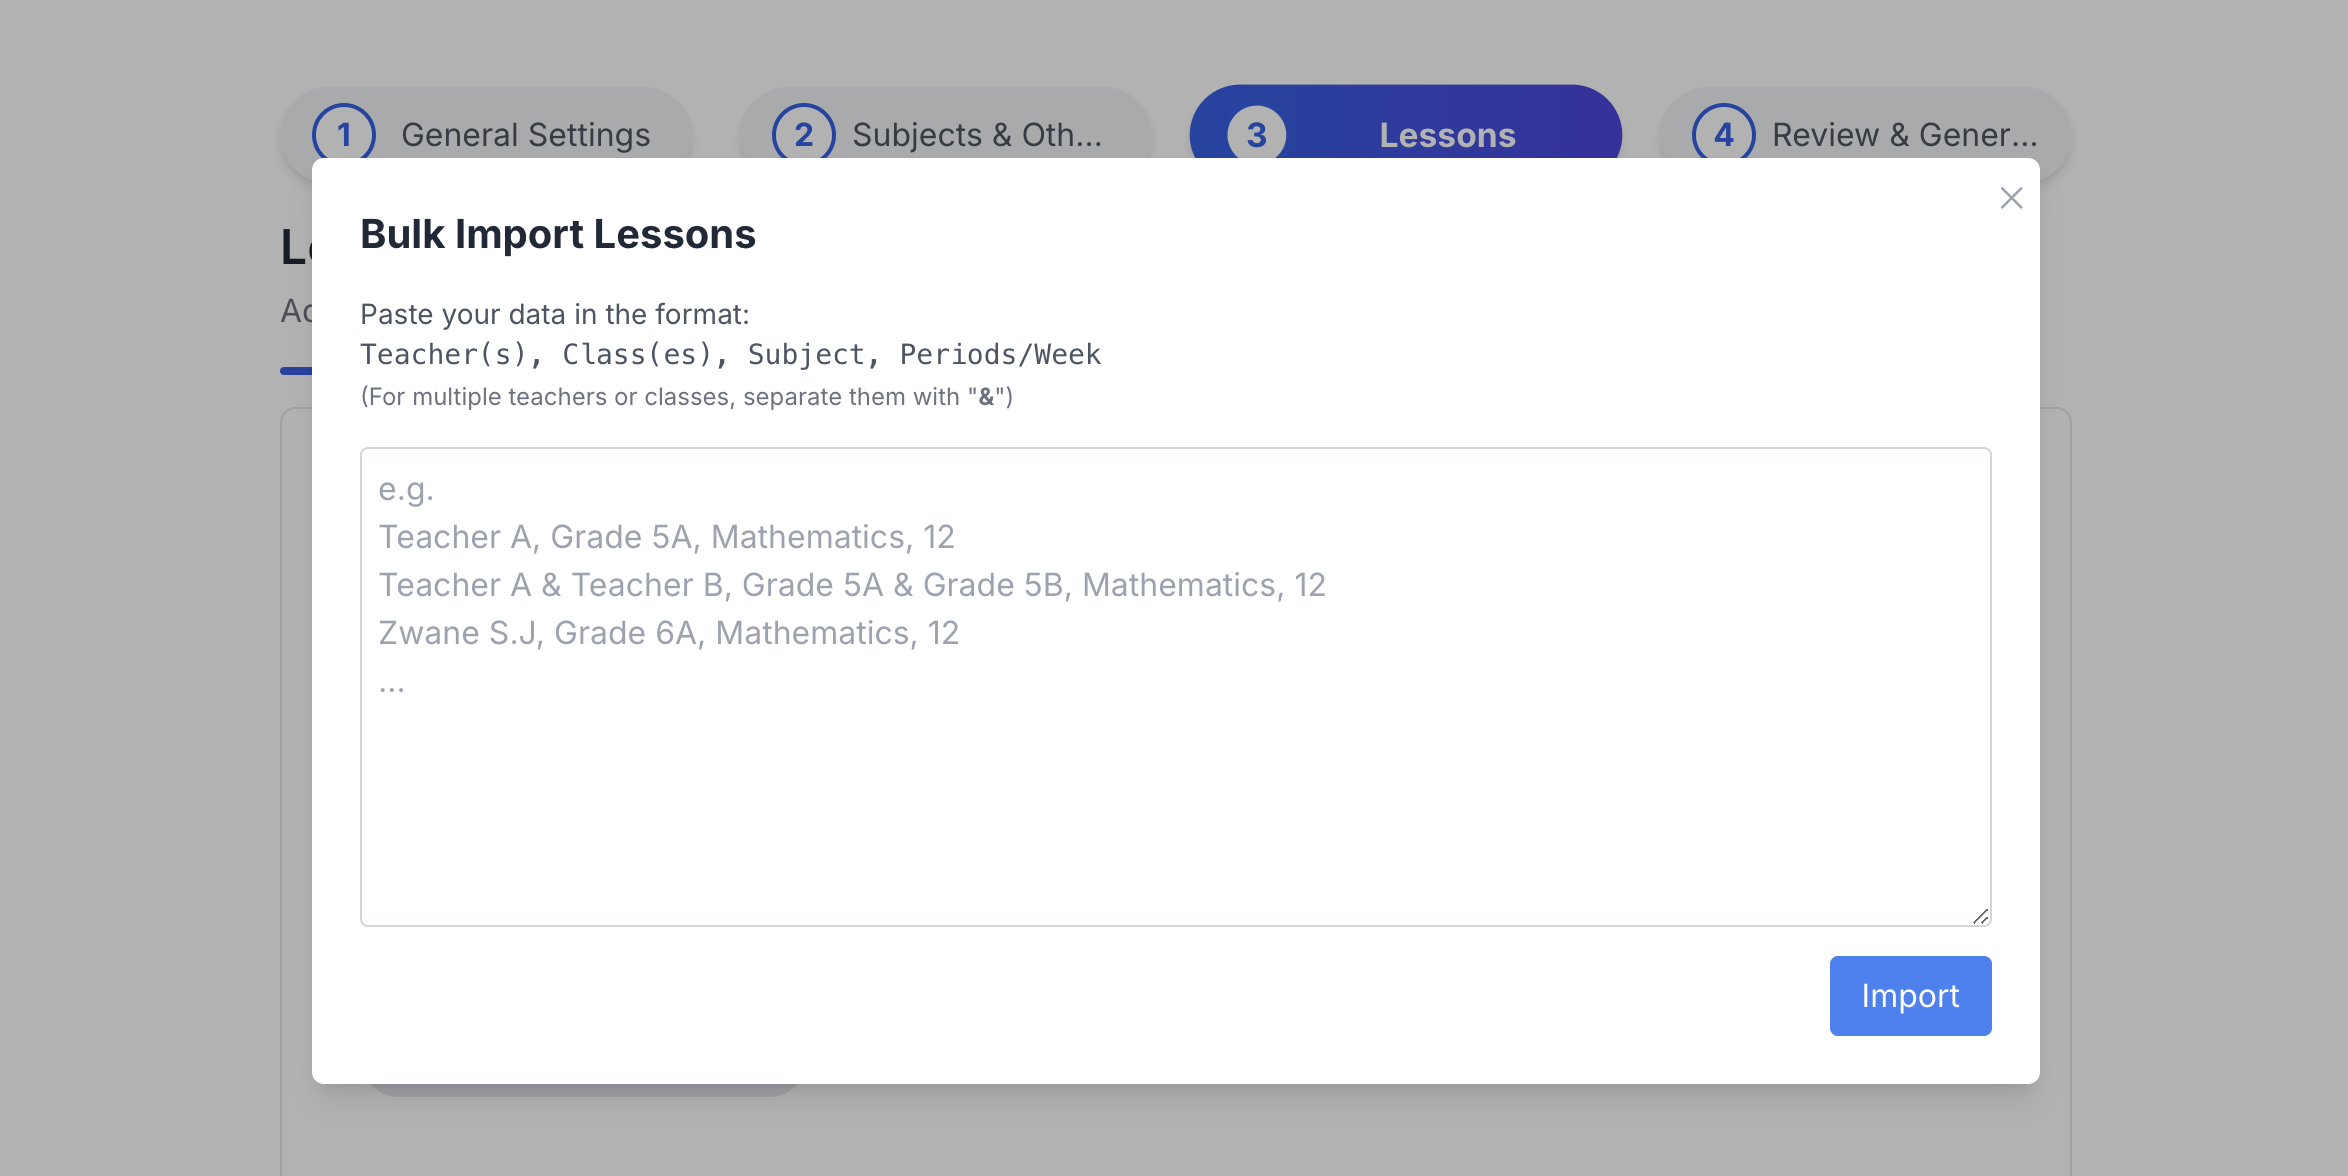
Bulk Import Tool
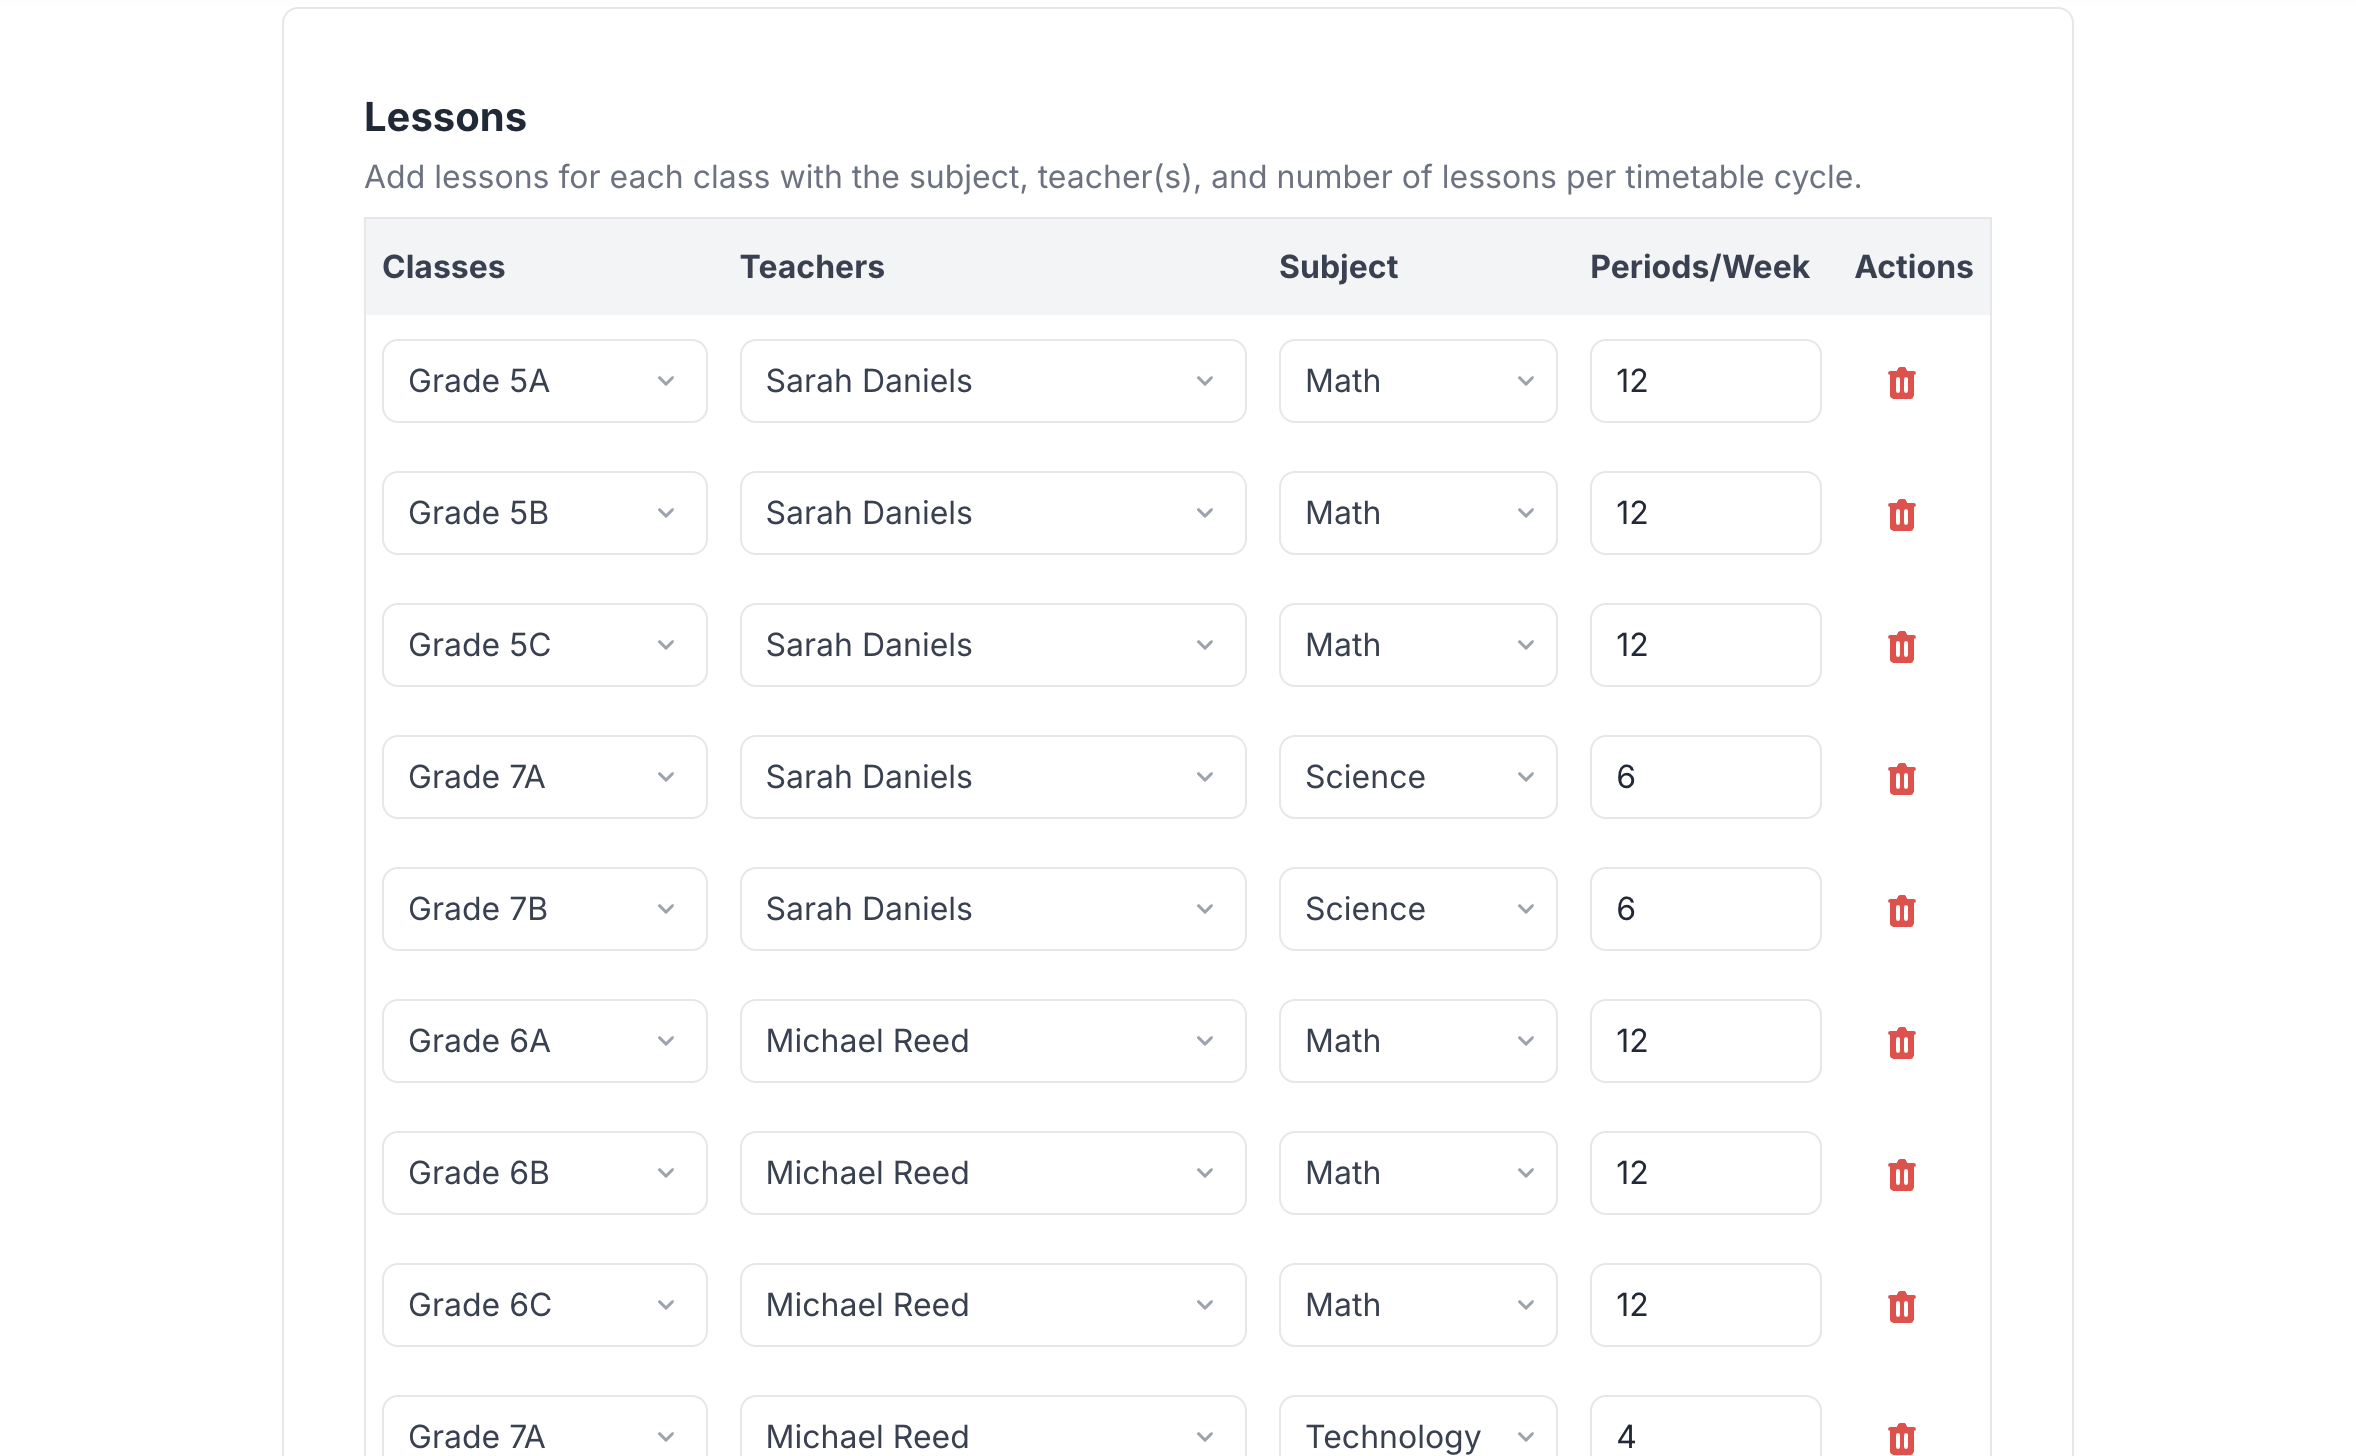
Lessons Added
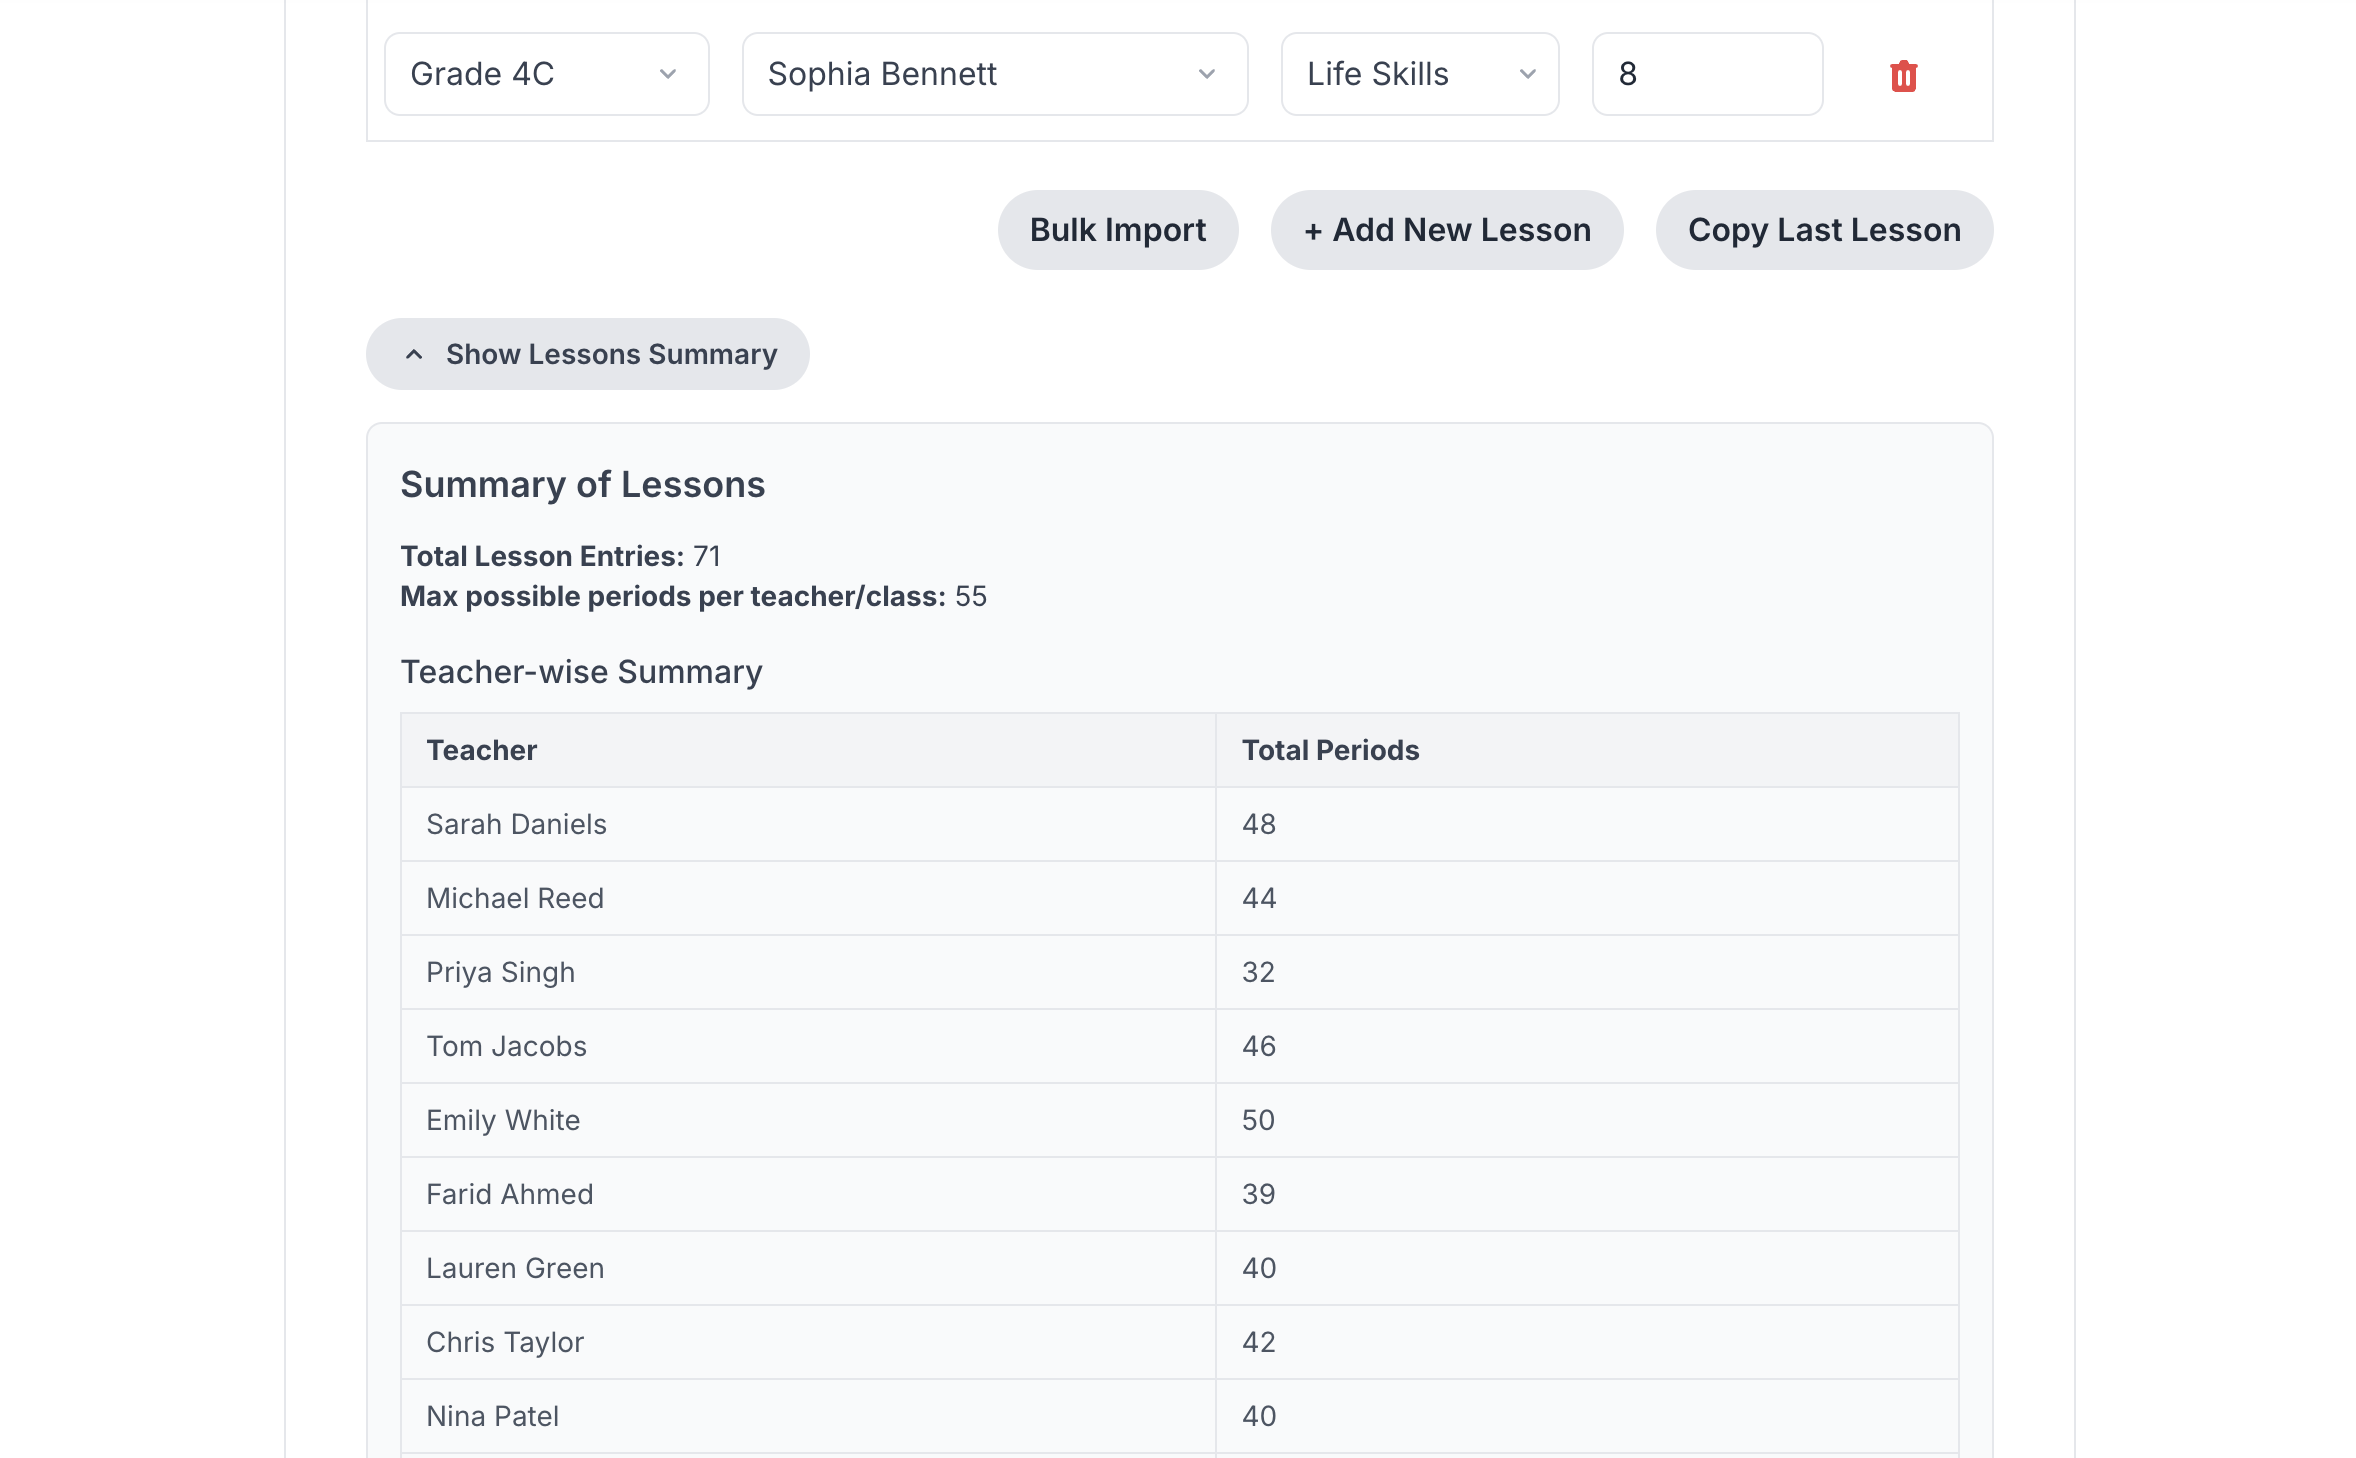
Summary View
Step 6: Data Review
Before generation, a thorough review ensures accuracy:
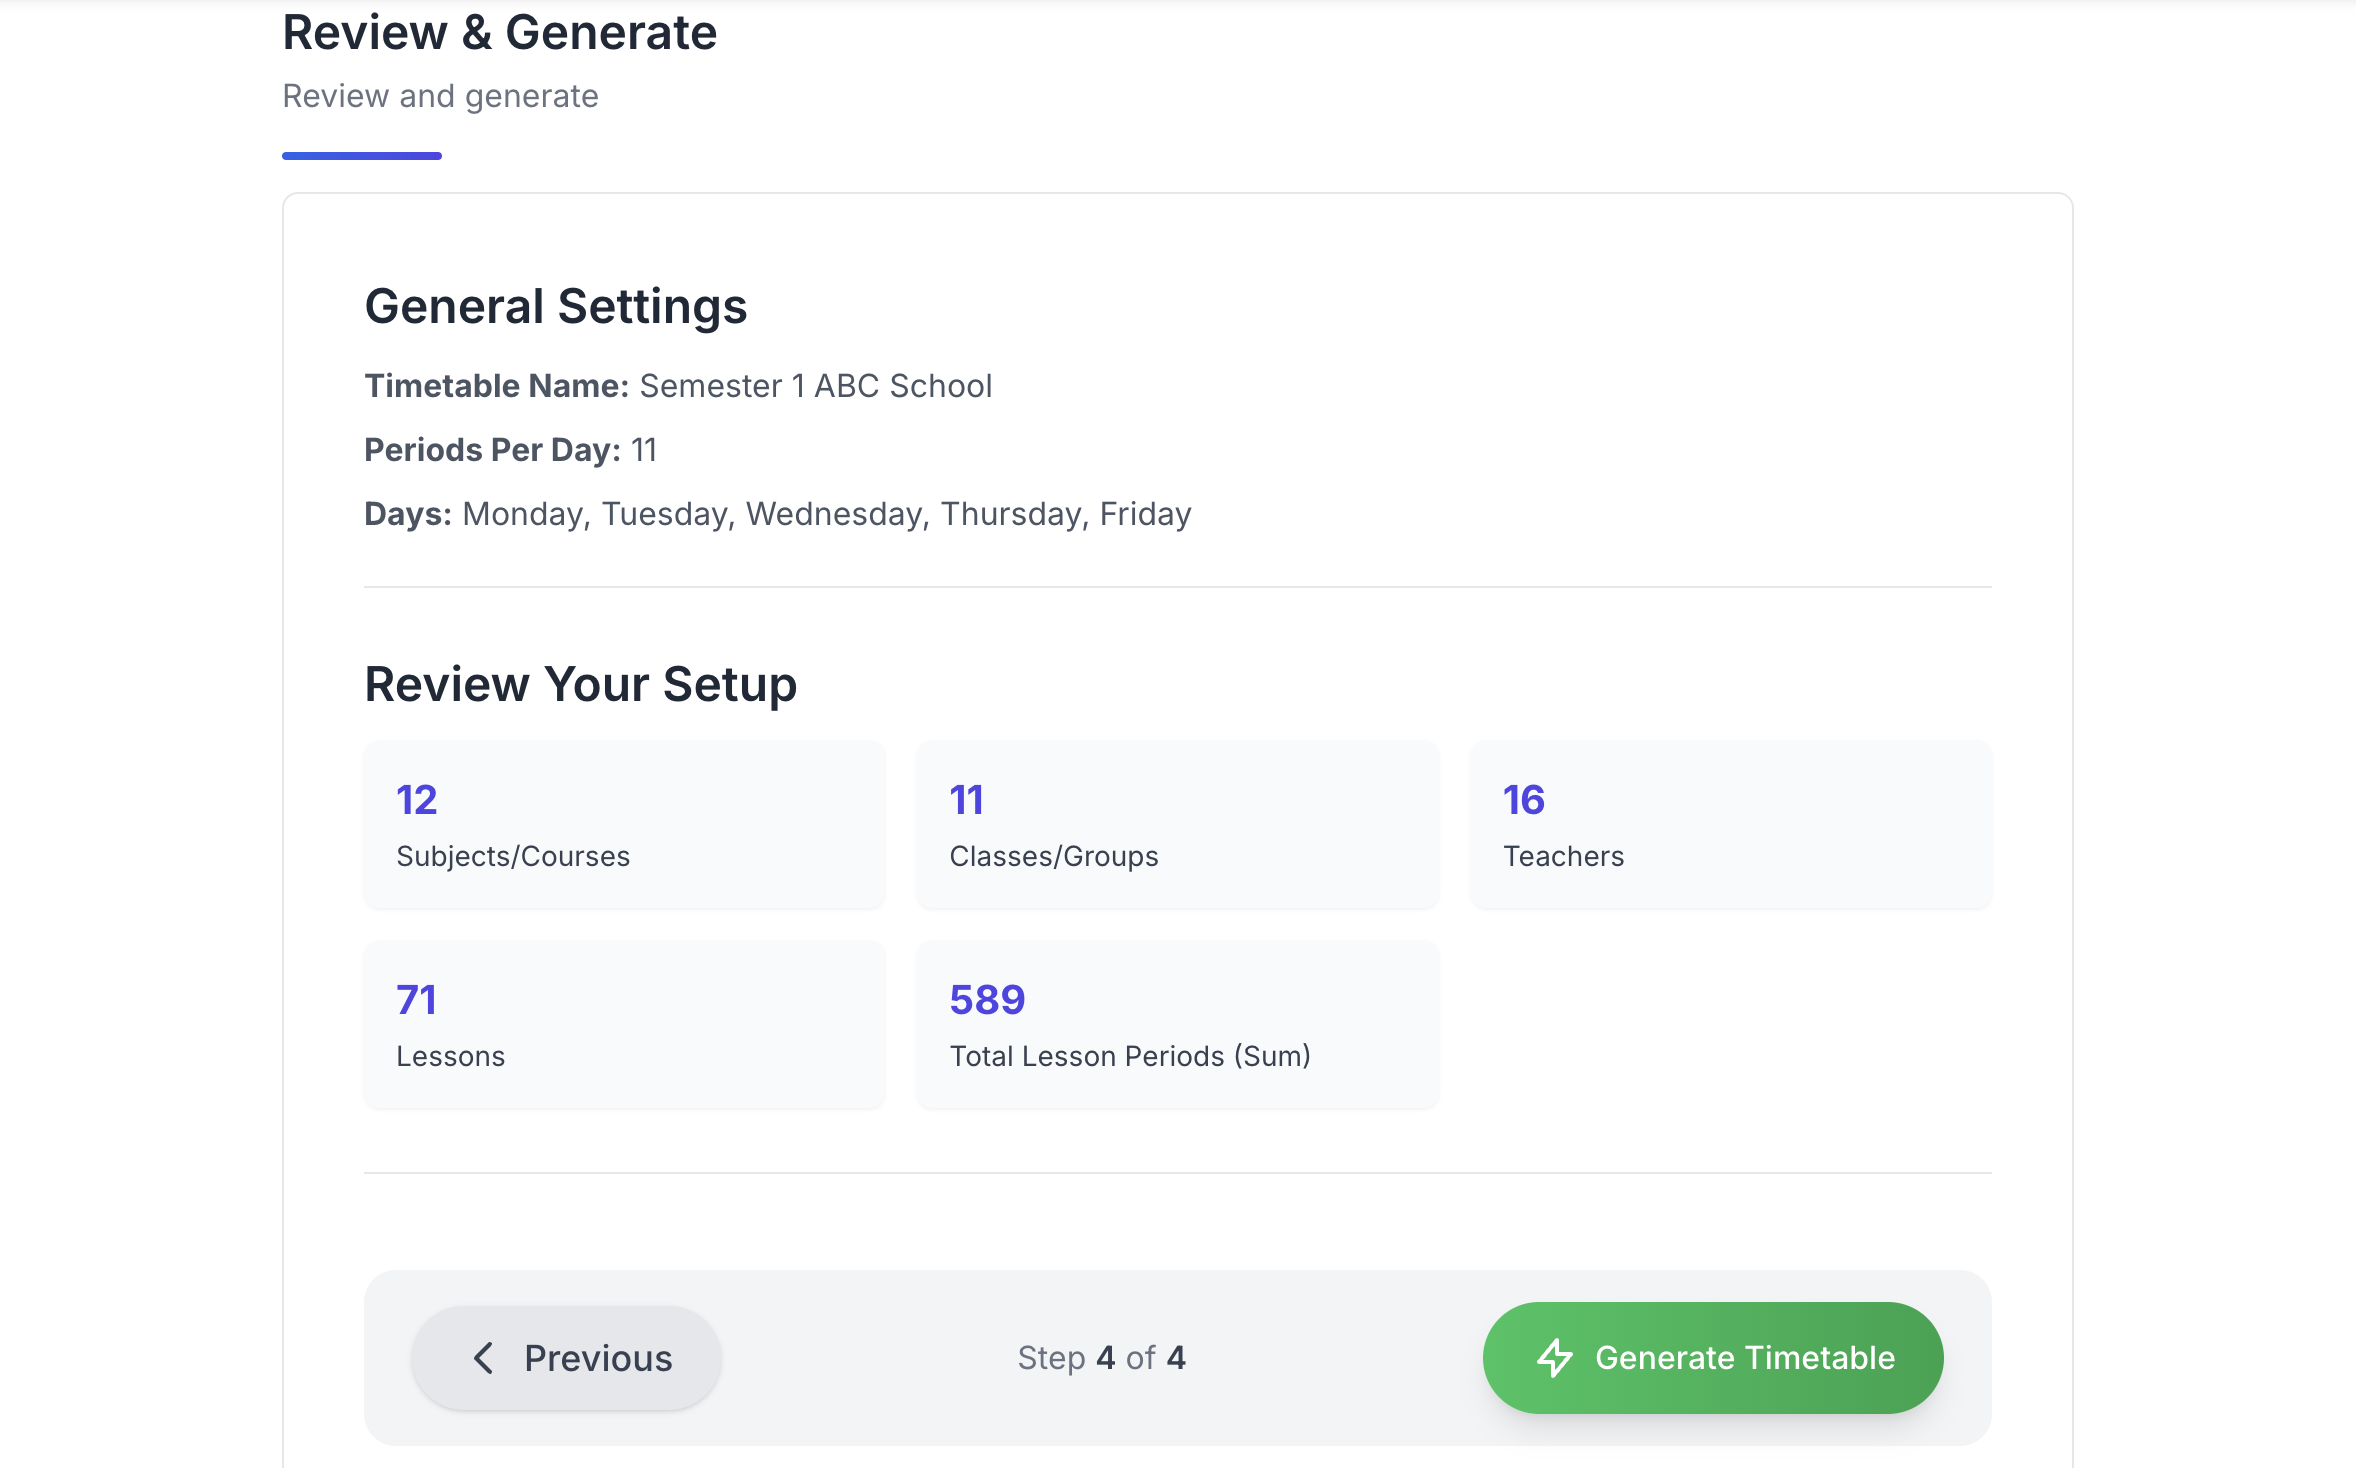
Review Interface
Verification Checklist:
- All teachers are correctly assigned
- Subject loads are balanced
- Class schedules are complete
- Special requirements are marked
- Time-offs are properly set
Step 7: Timetable Generation
The moment of truth - generating your conflict-free timetable:
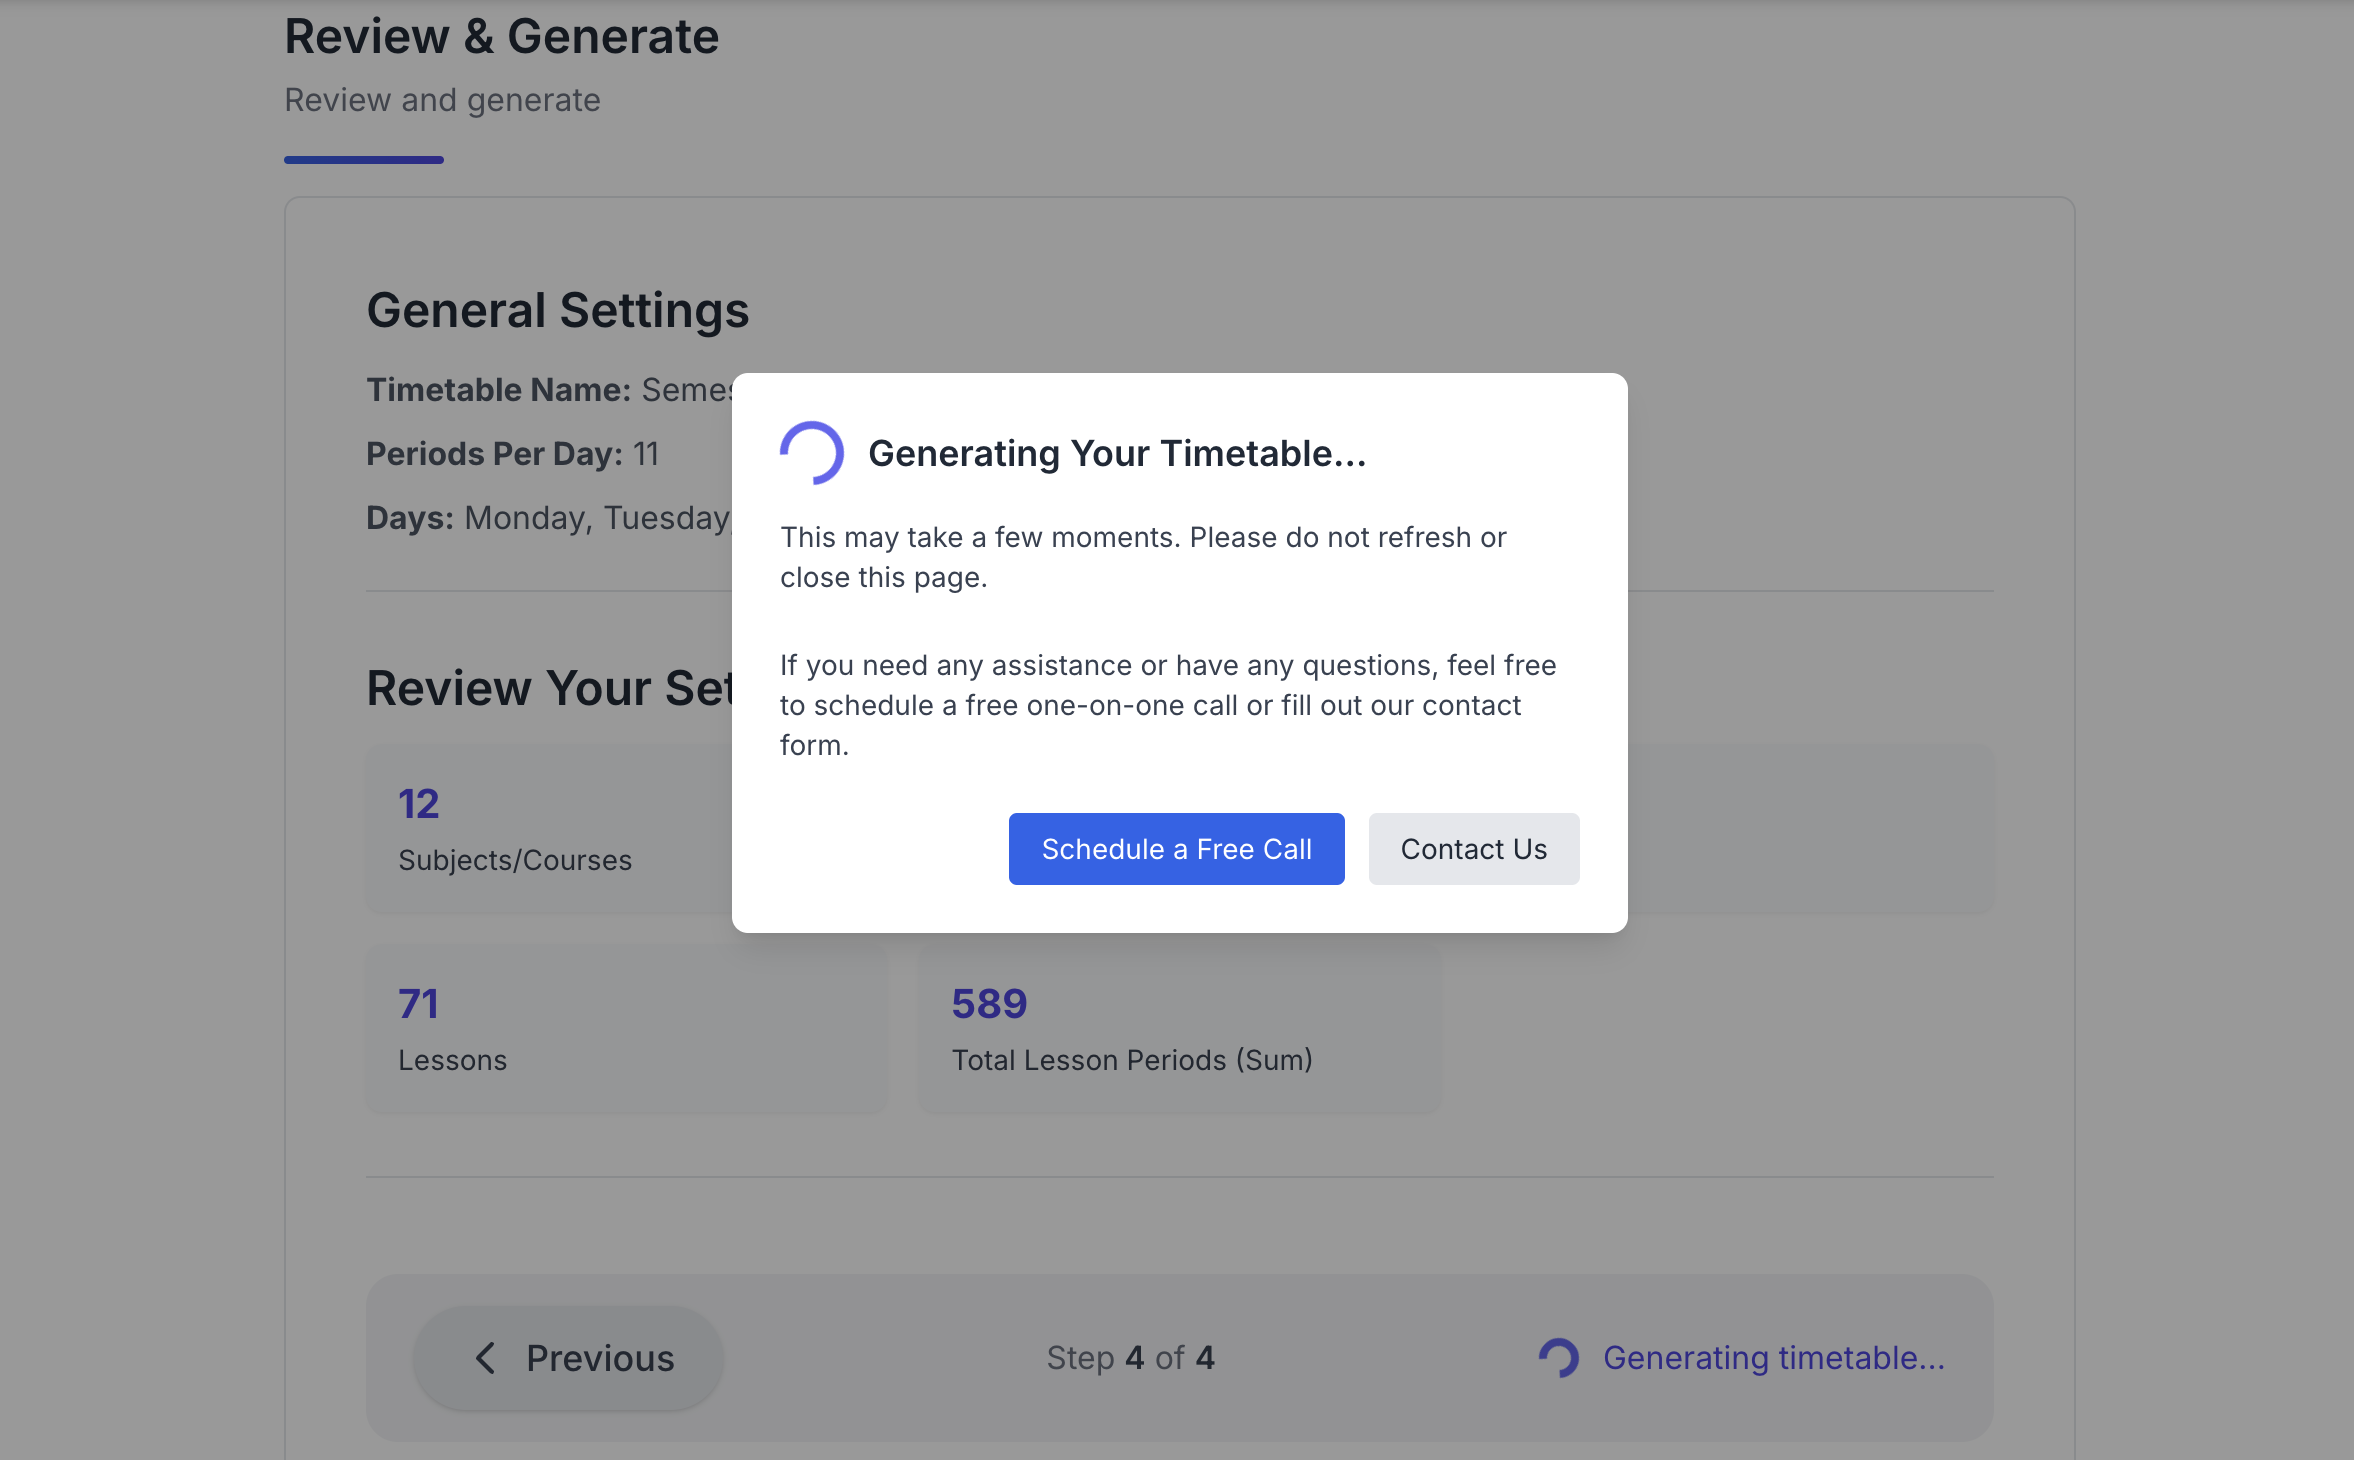
Generation Interface
What Happens:
- Intelligent conflict resolution
- Optimal period distribution
- Teacher workload balancing
- Resource optimization
Result:
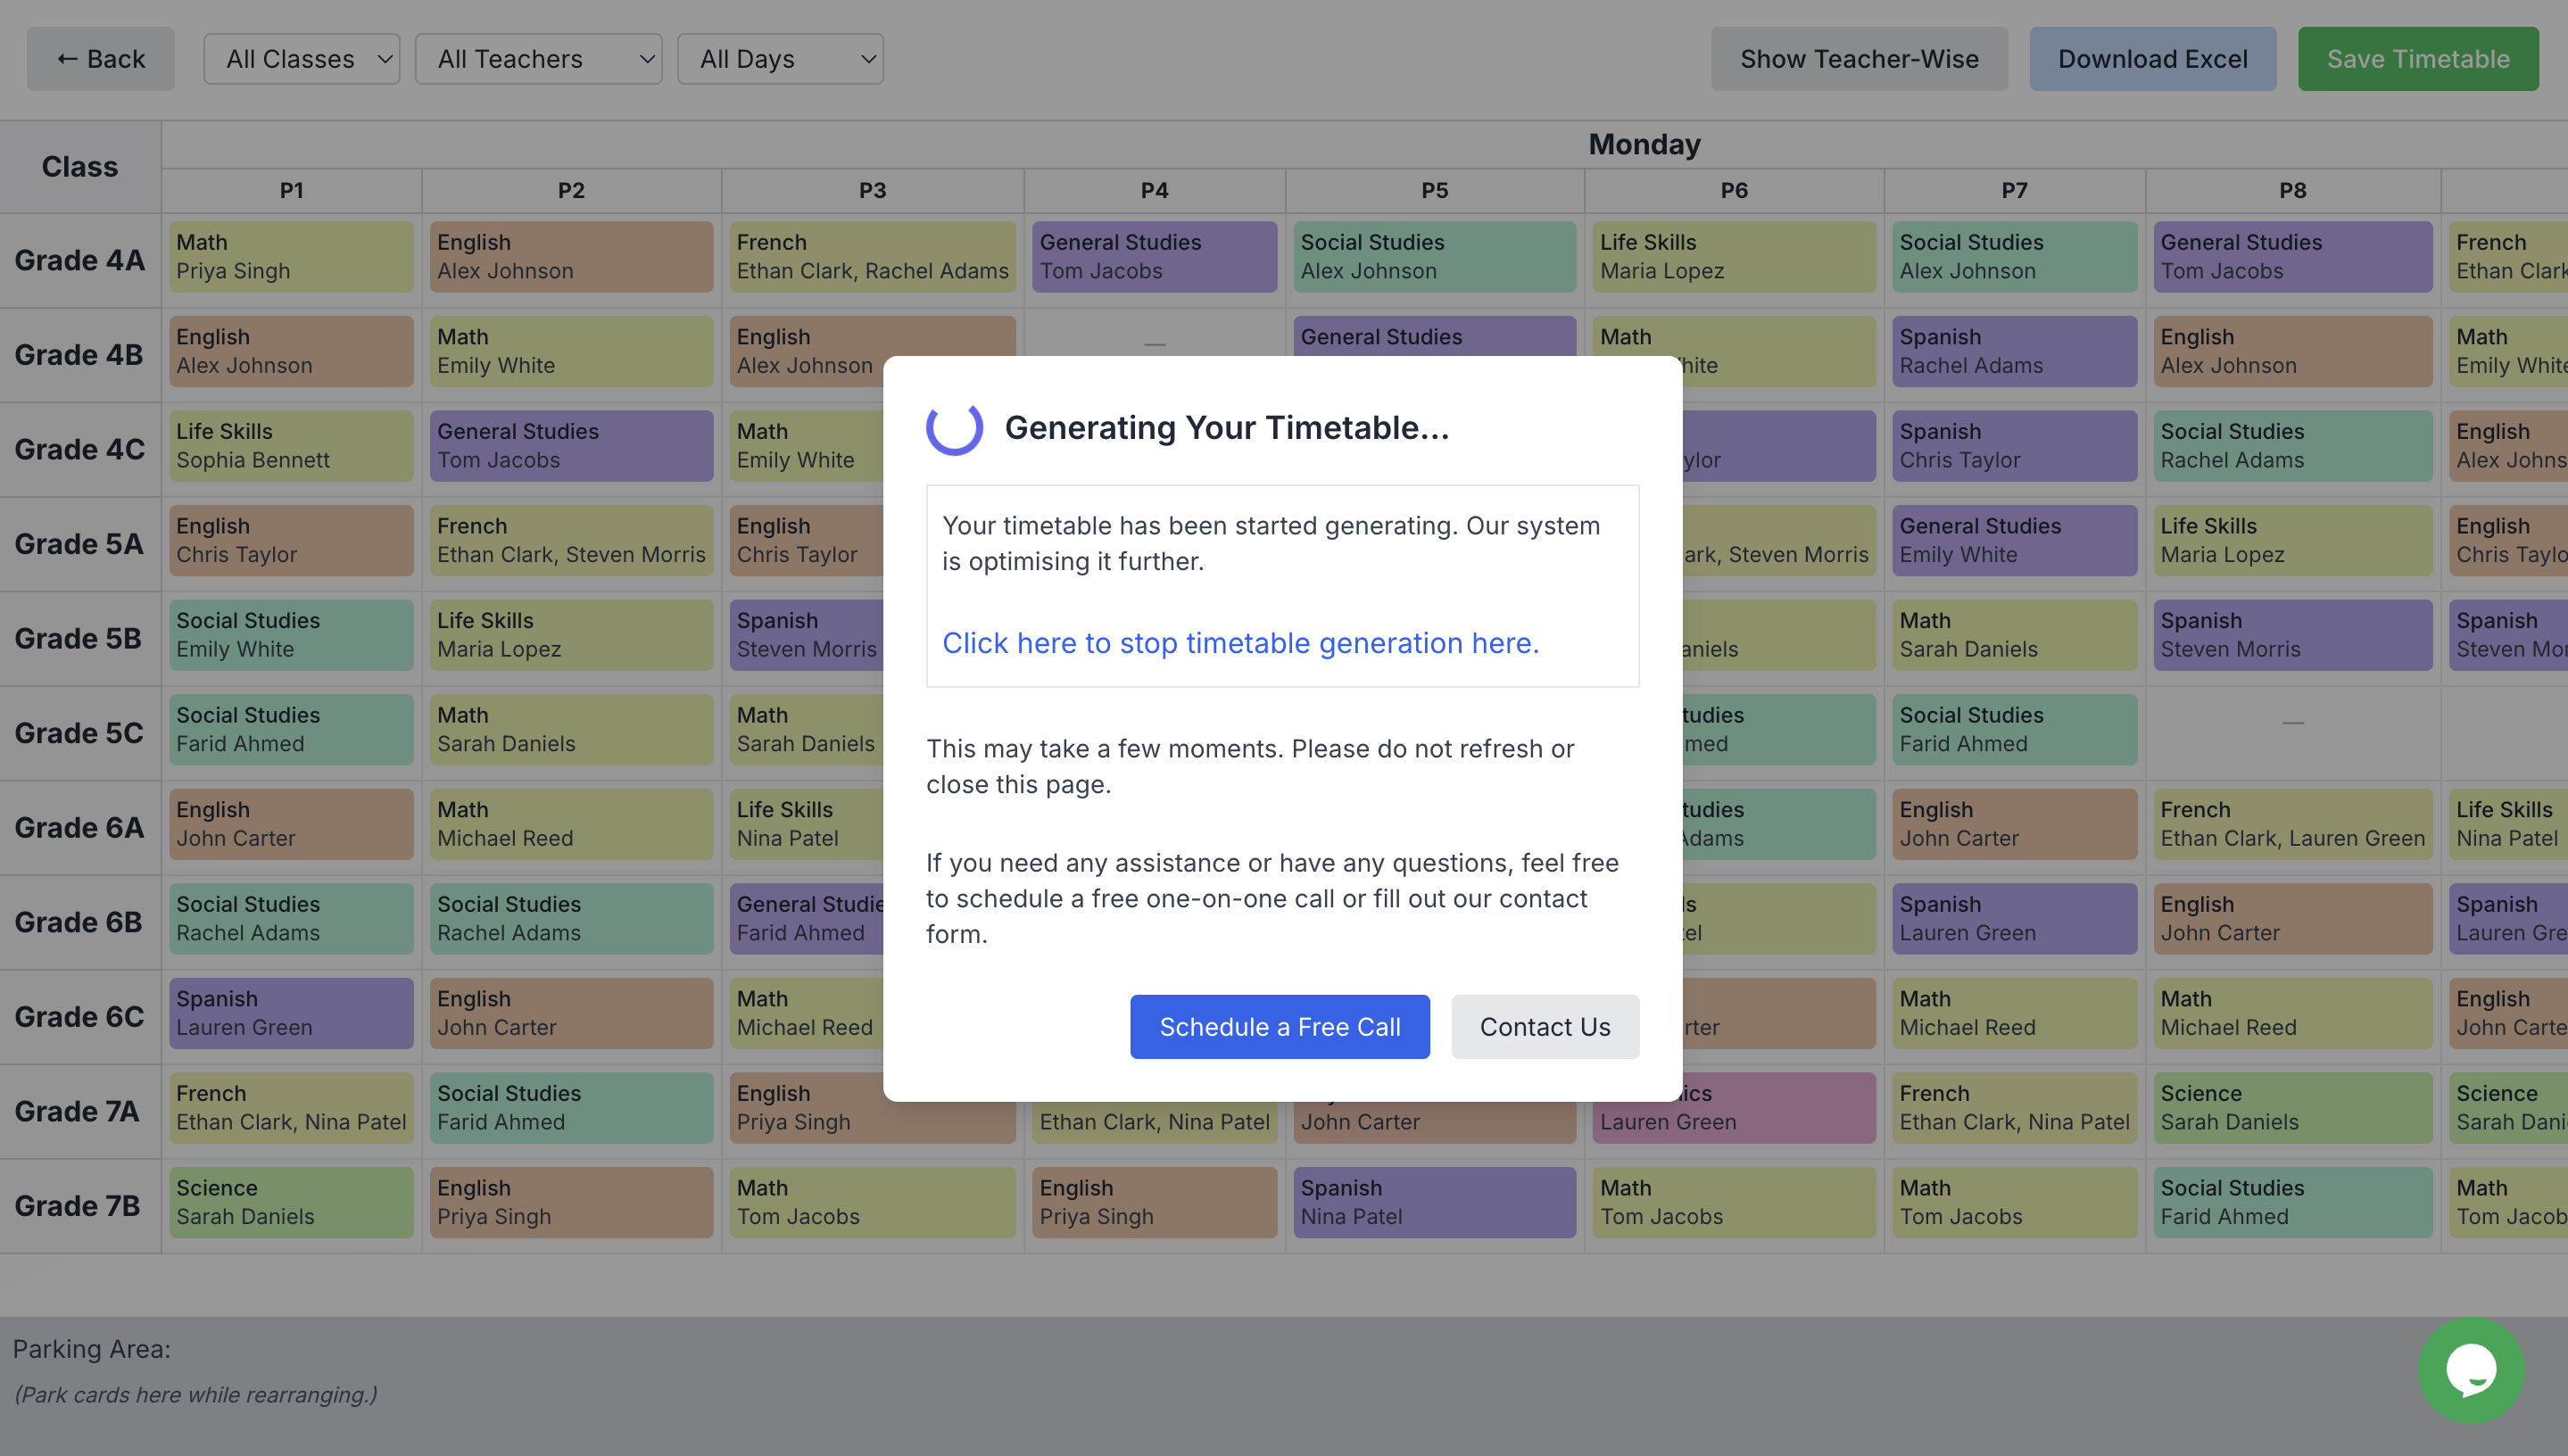
Generated Timetable
Step 8: Fine-tuning
After generation, you can make manual adjustments:
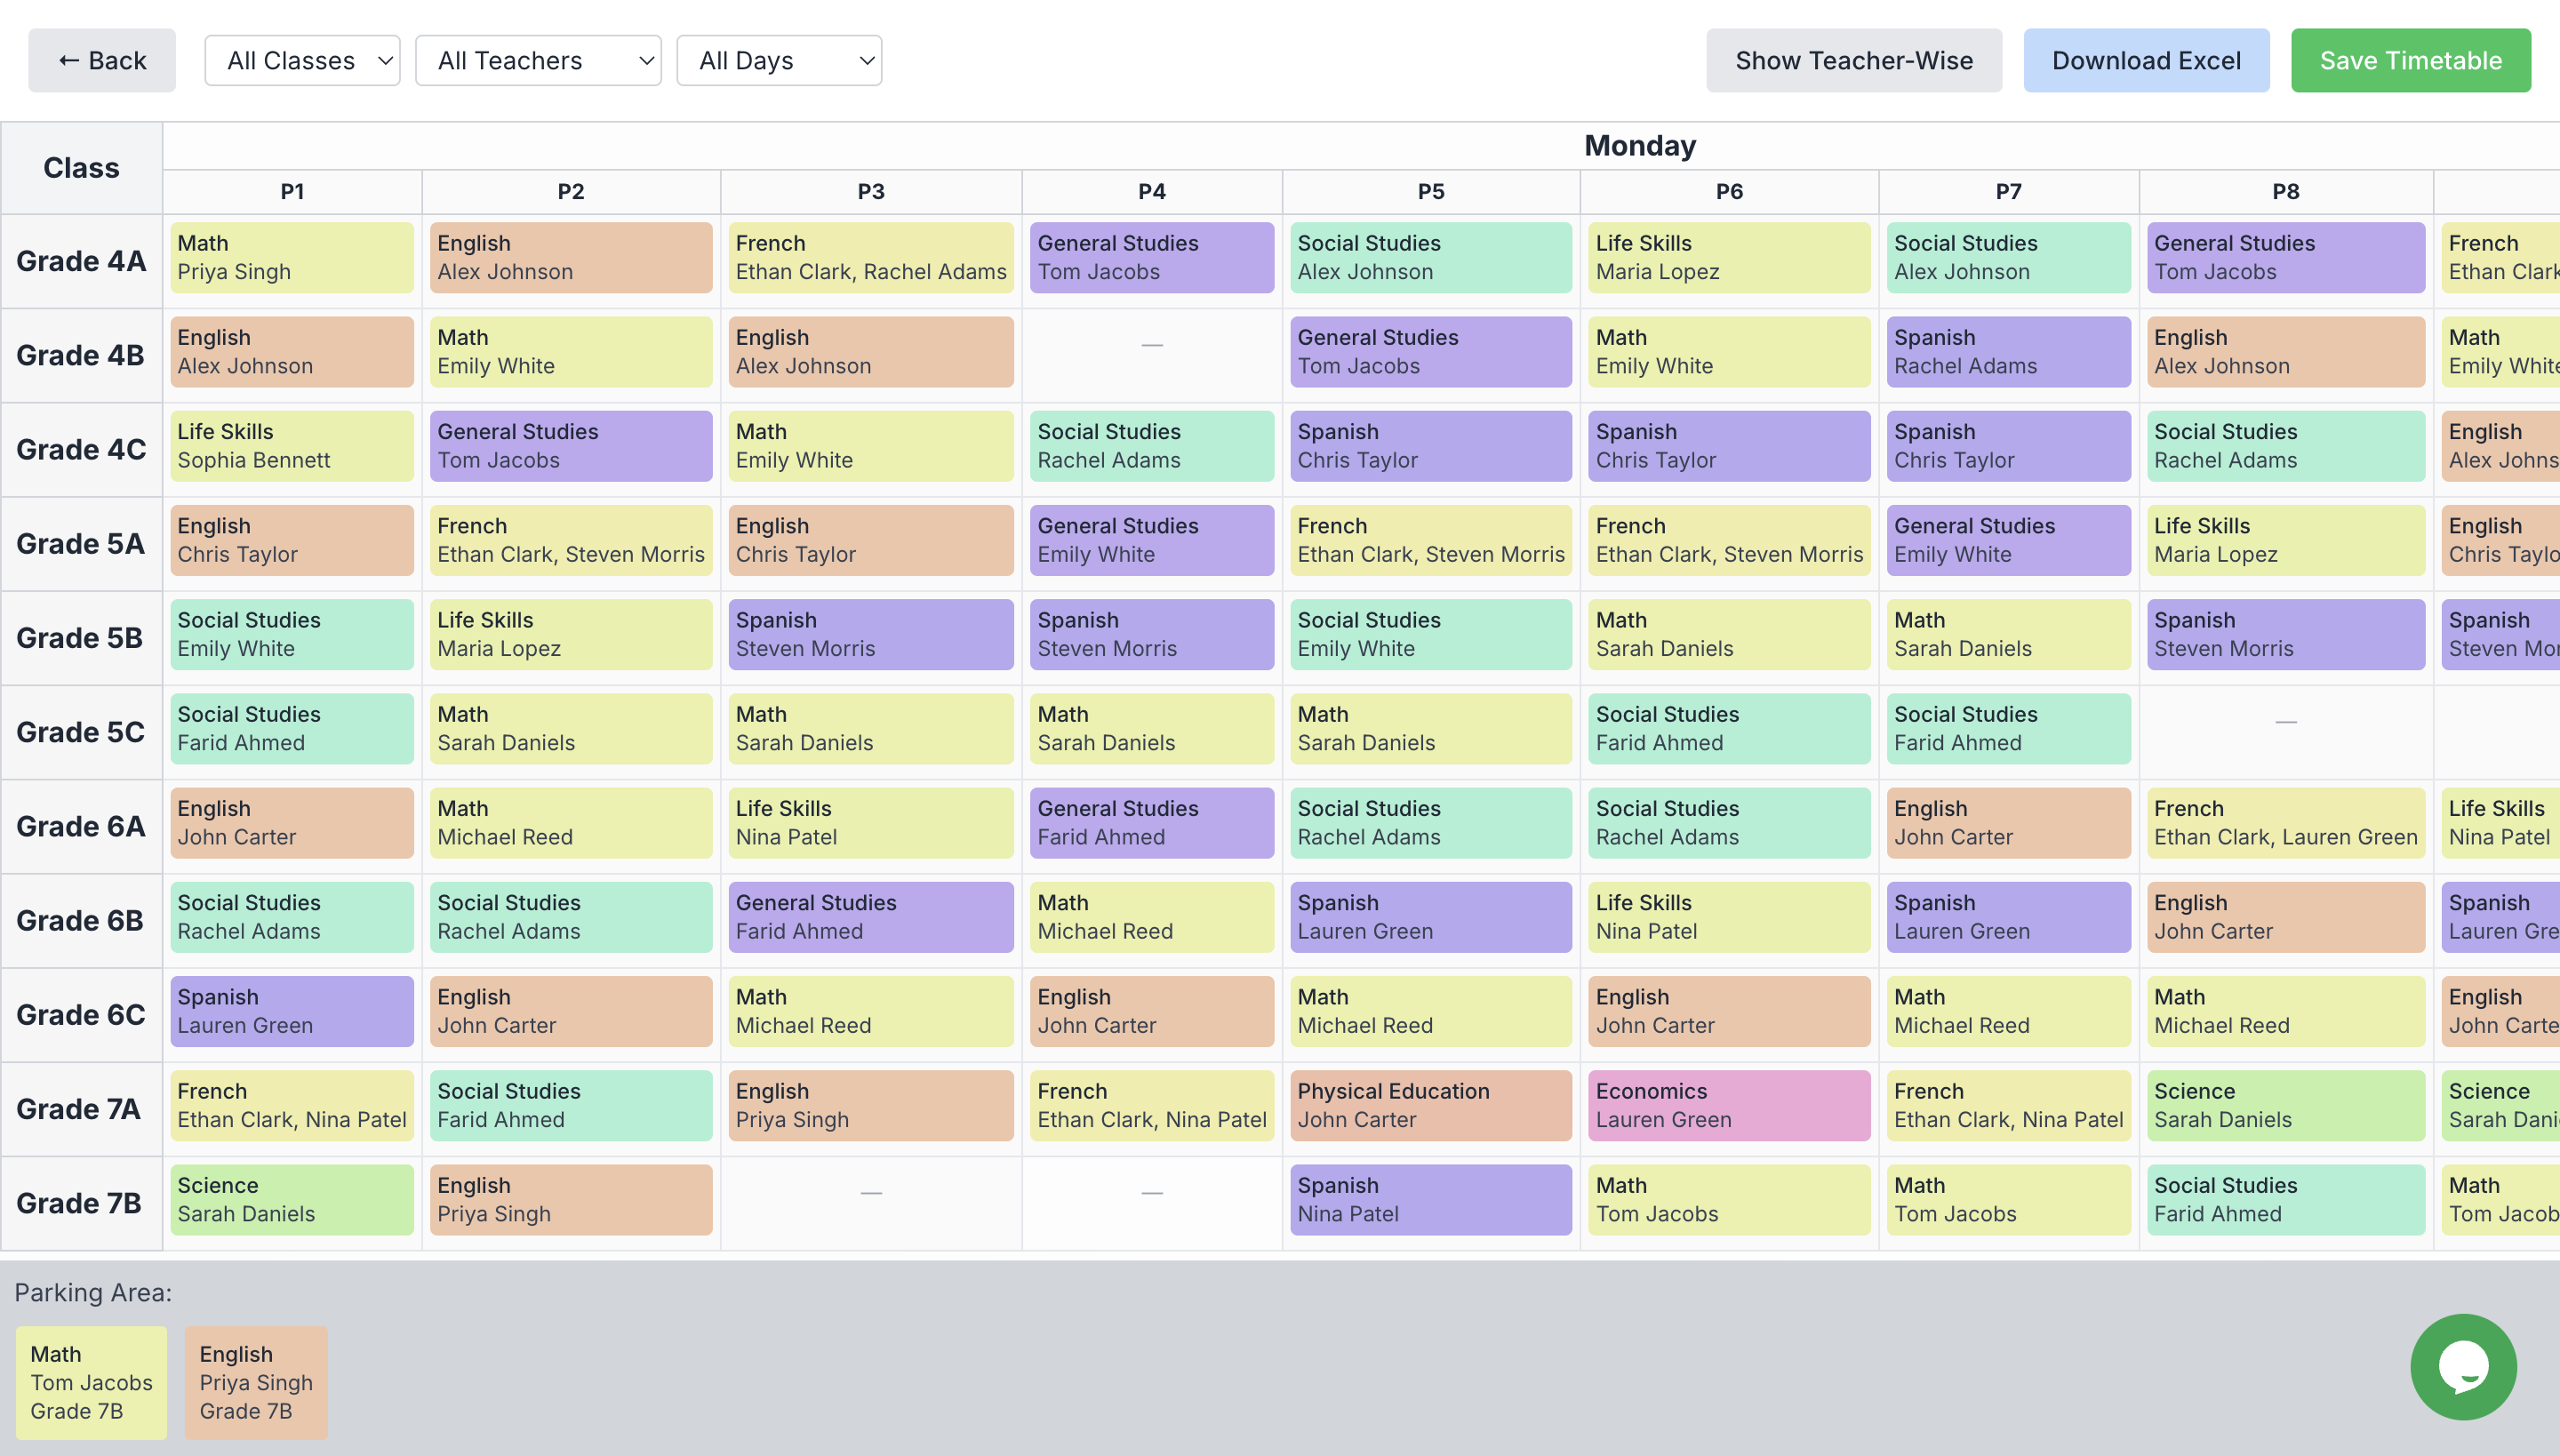
Adjustment Interface
Features:
- Drag-and-drop interface
- Real-time conflict checking
- Instant validation
- Change history tracking
Step 9: Finalization and Distribution
Complete your timetable creation with:
- Final review and approval
- Format selection for distribution
- Sharing options setup
- Backup creation
Benefits of Using TimetableMaster
-
Time Efficiency
- Minutes instead of days
- Automated conflict resolution
- Bulk data handling
-
Accuracy
- Zero scheduling conflicts
- Perfect resource allocation
- Balanced distributions
-
Flexibility
- Easy modifications
- Multiple format support
- Cloud-based access
-
Scalability
- Handles any school size
- Grows with your needs
- Adaptable to changes
Calculate Your ROI with TimetableMaster
See how much time and money you could save with automated timetable generation.
Ready to Simplify Your Scheduling?
Transform your timetable creation process with TimetableMaster. Join thousands of schools already benefiting from our intelligent scheduling solution.